
Flowers & nature · Step-by-step guide
Camellia Flower Bookmark
Fold a layered camellia and a pair of green leaves into a small flower bookmark. Choose red, white, or your favorite paper color.
What you’ll need
- One thin paper square for the flower
- One green paper rectangle, approximately 2:1 in proportion
- A small amount of craft glue, optional for assembly
Paper craft · Folding and assembly
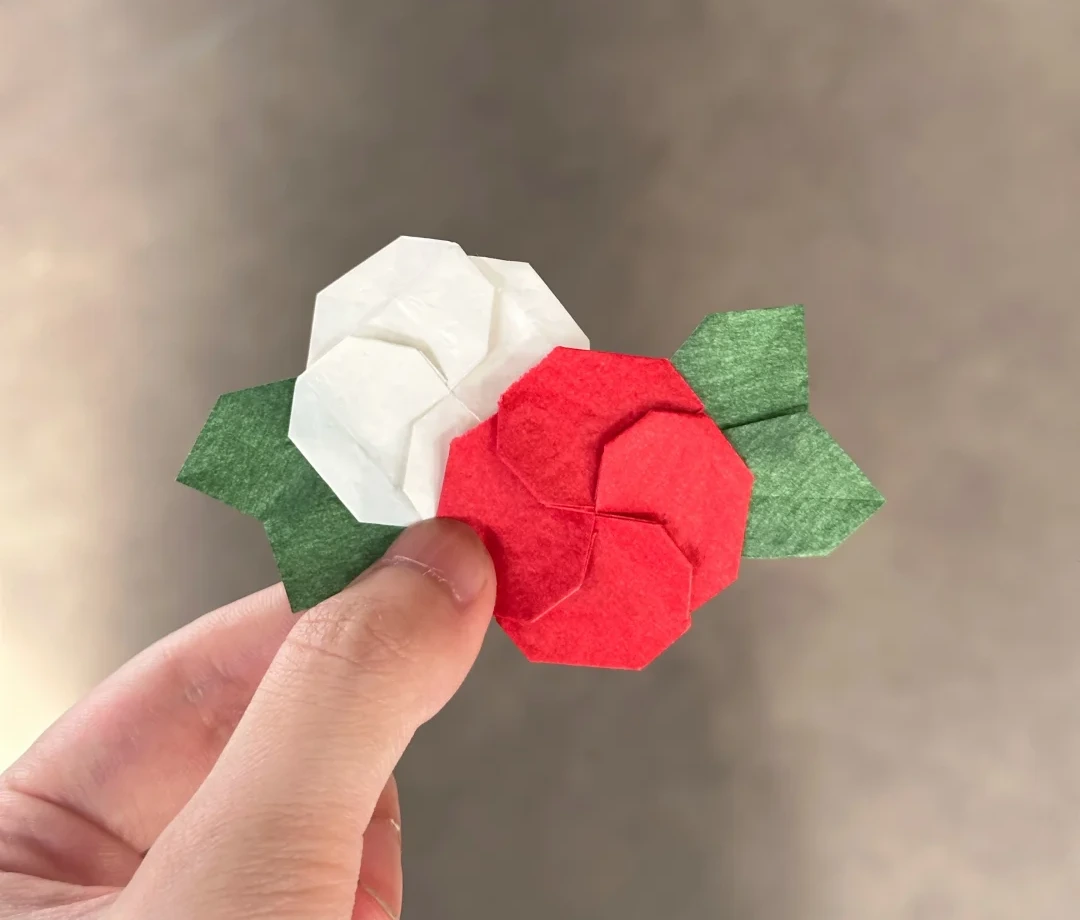
Make it, step by step.
19 steps · Original diagrams with English instructions
Read each picture from left to right, then top to bottom. Exact paper dimensions are not specified; the leaf rectangle is approximately twice as wide as it is tall.
A flower with two leaves
 Open image at full size ↗
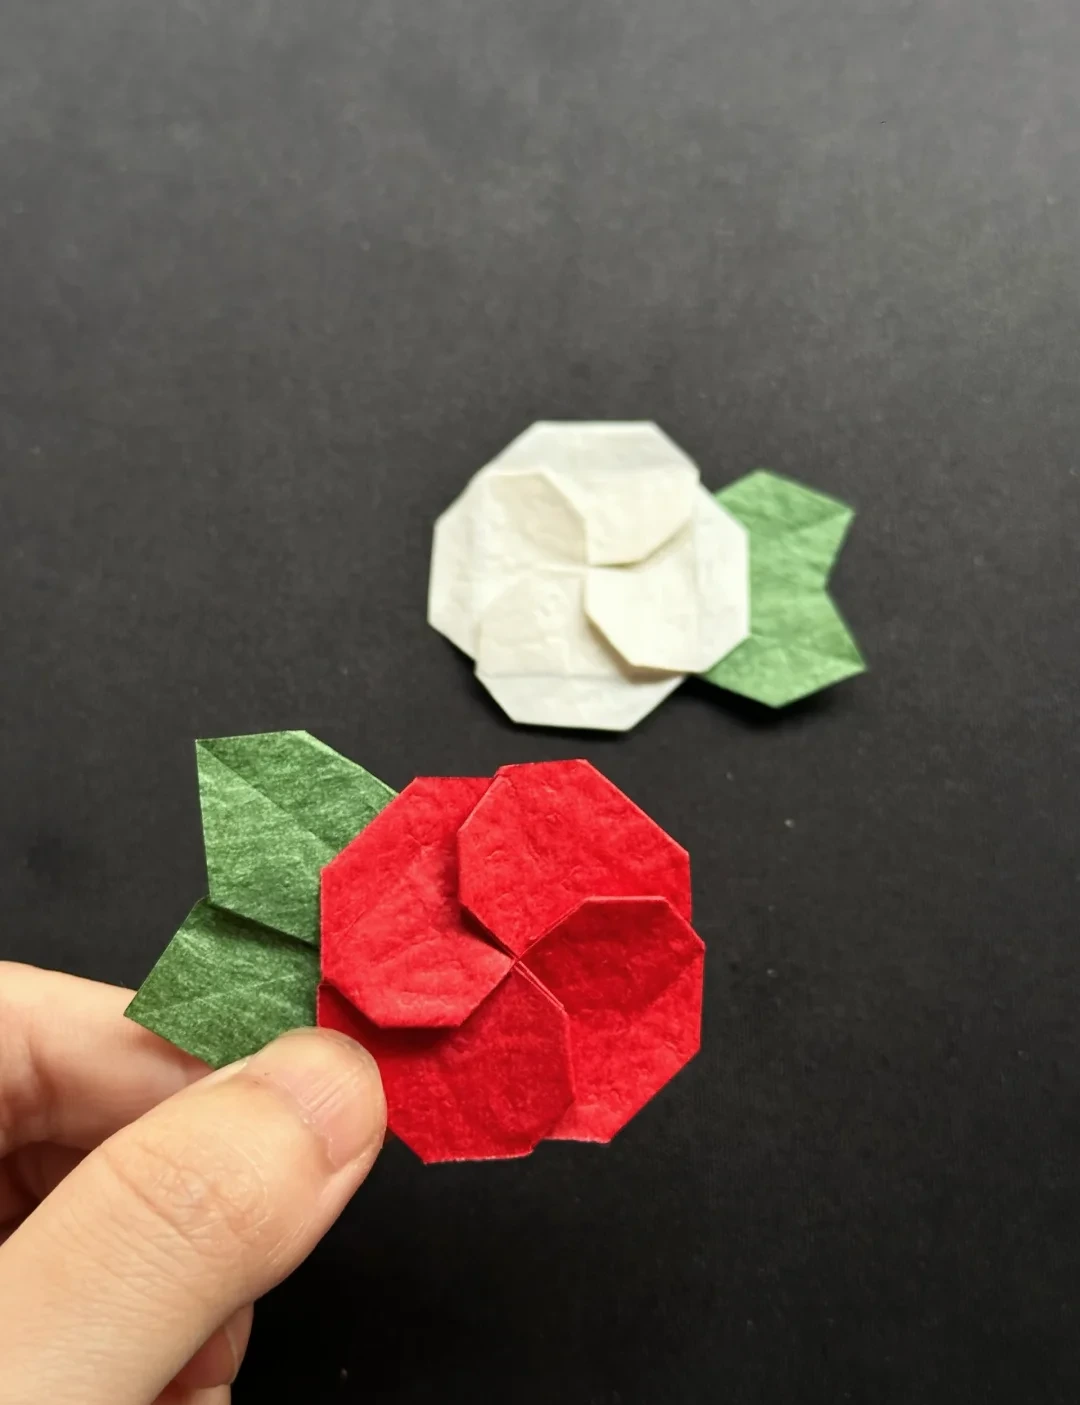
Fold a small camellia and a separate pair of green leaves, then combine them into a flower bookmark. The red and white examples use the same folds.
Start the flower base
 Open image at full size ↗
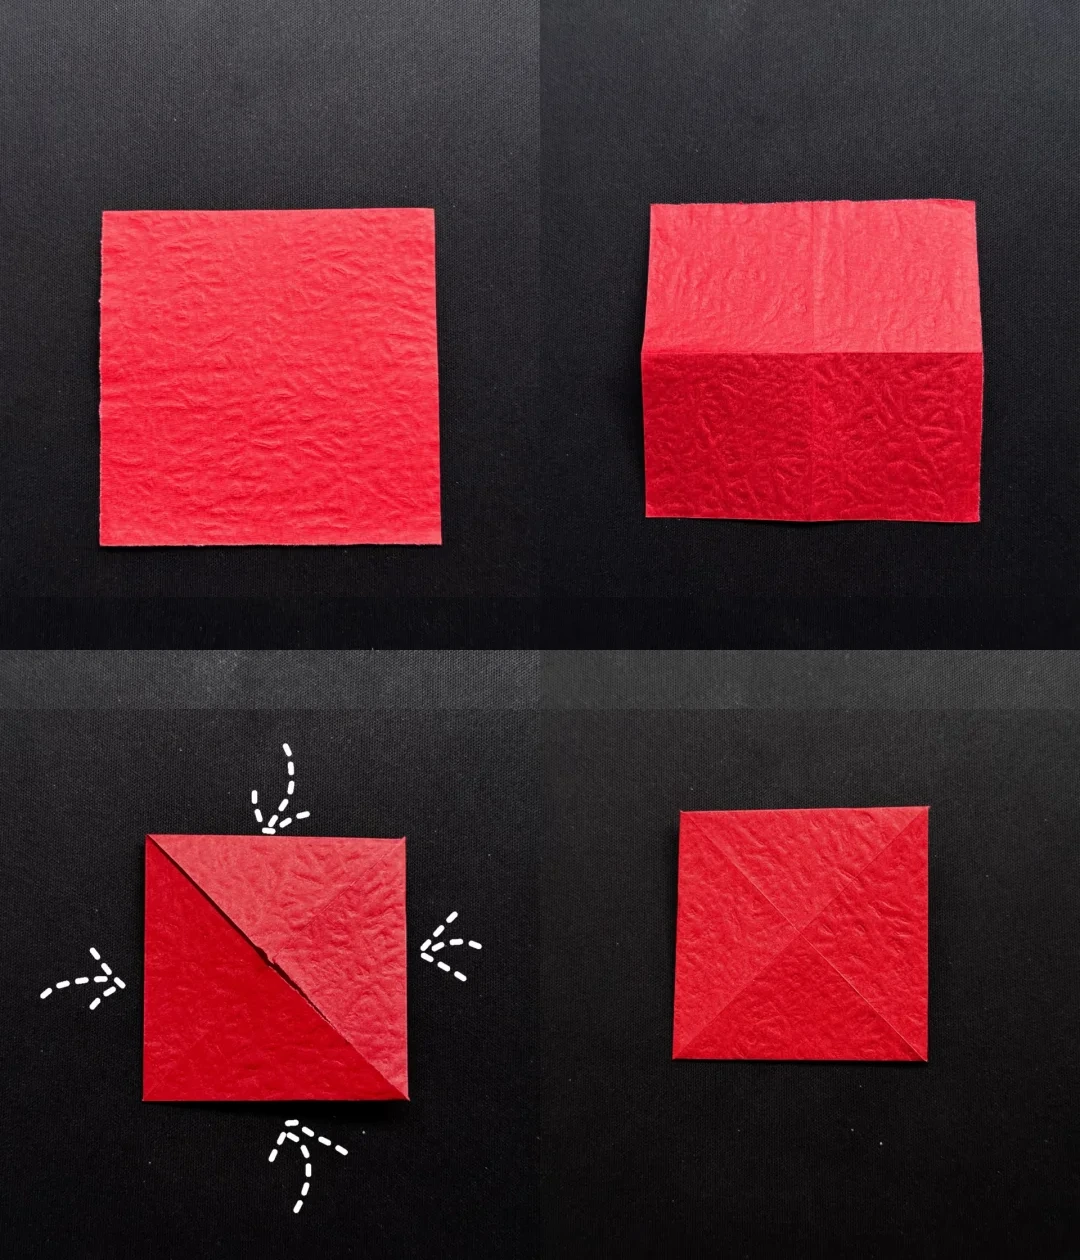
Start with a square of thin paper in your chosen flower color. Fold it in half horizontally and vertically, unfolding each time to mark a cross through the center.
Bring all four corners to the center and flatten the folds into a smaller square.
Turn the model over.
Build the layered petals
 Open image at full size ↗
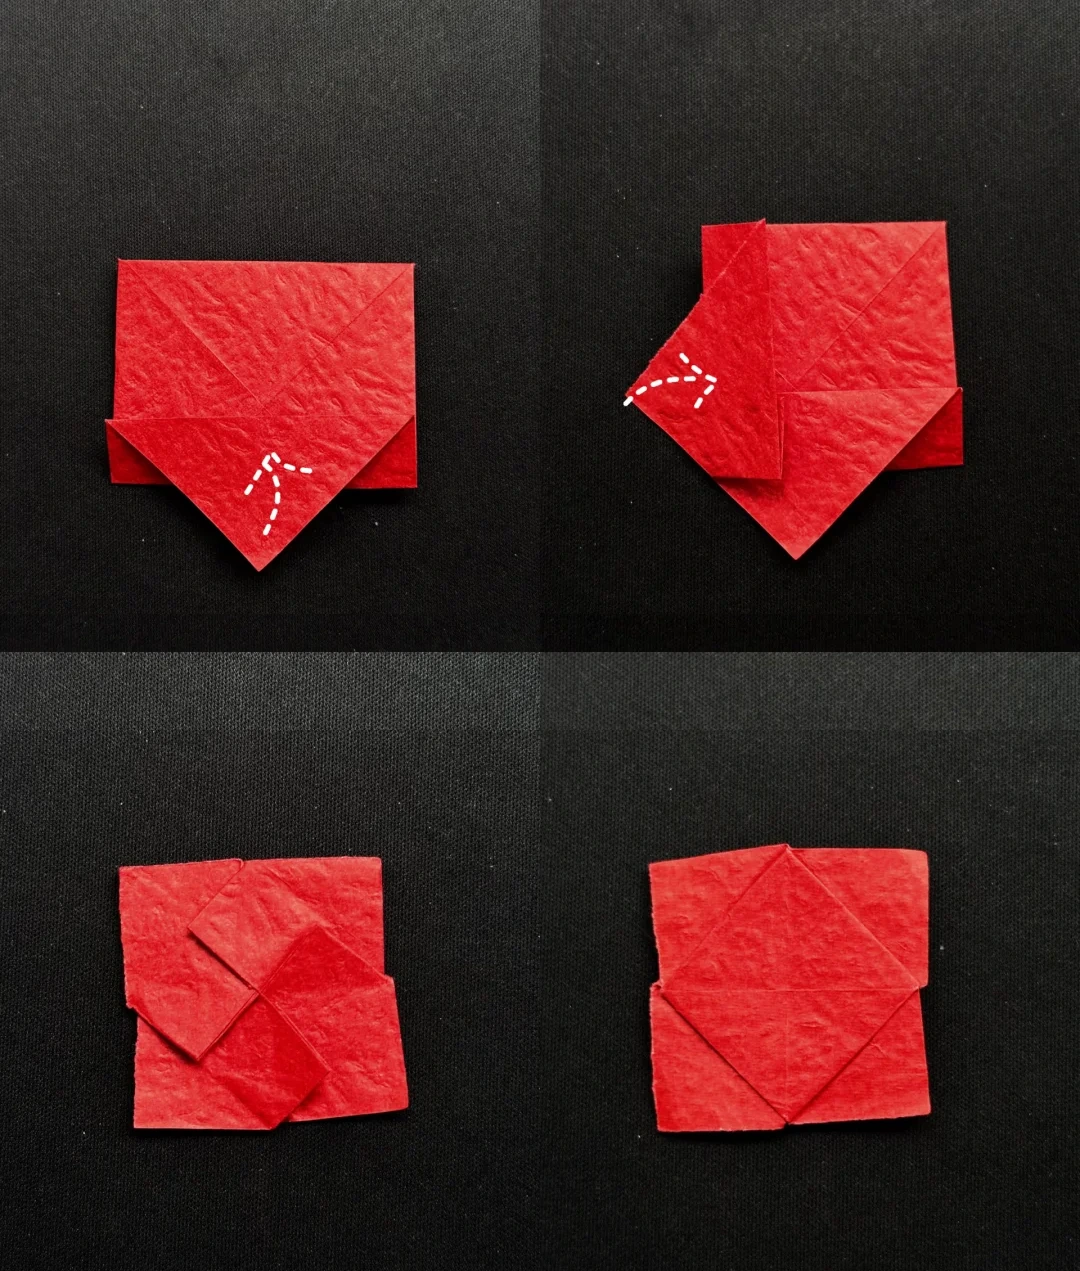
With a point facing downward, fold that point up to the center, following the dotted line.
Fold the left point inward in the same way, then repeat with the remaining two points.
Turn the folded square over.
Round the flower
 Open image at full size ↗
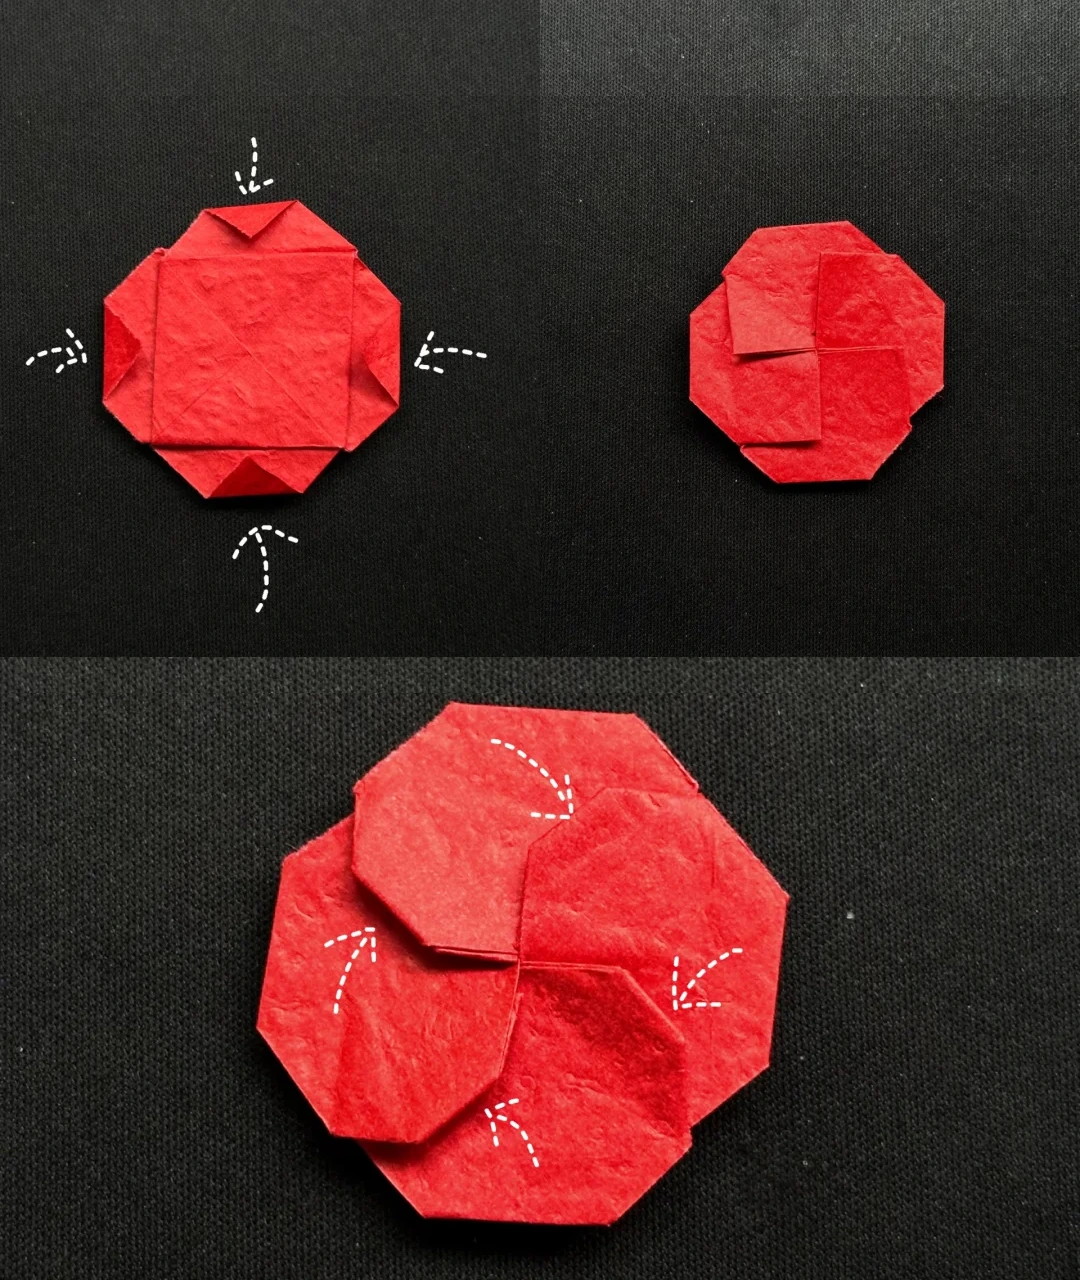
Fold each of the four outer corners inward a little, following the arrows. Keep these folds small so the flower stays broad.
Turn the flower over to the front.
Tuck the four pointed tips inward slightly to soften the outline. Flatten gently to finish the camellia.
Precrease the leaves
 Open image at full size ↗
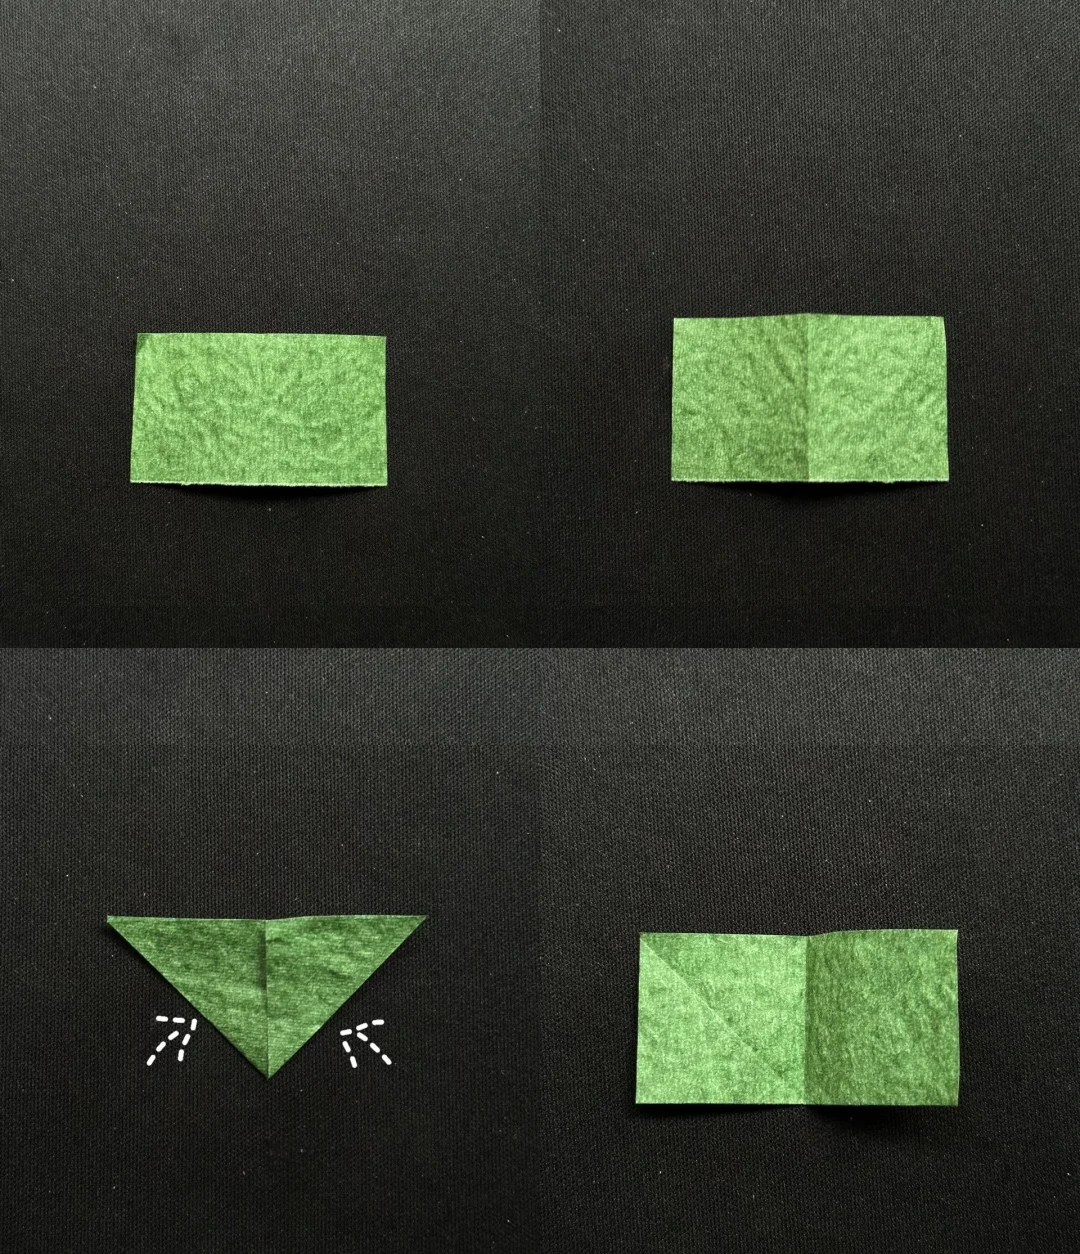
Place a green paper rectangle horizontally. Use a rectangle about twice as wide as it is tall. Fold it in half from side to side, then unfold to mark the vertical center.
Fold the two lower corners toward the center line to form the downward-pointing triangle shown. Crease both diagonal folds, then unfold the rectangle.
Form the center pleat
 Open image at full size ↗
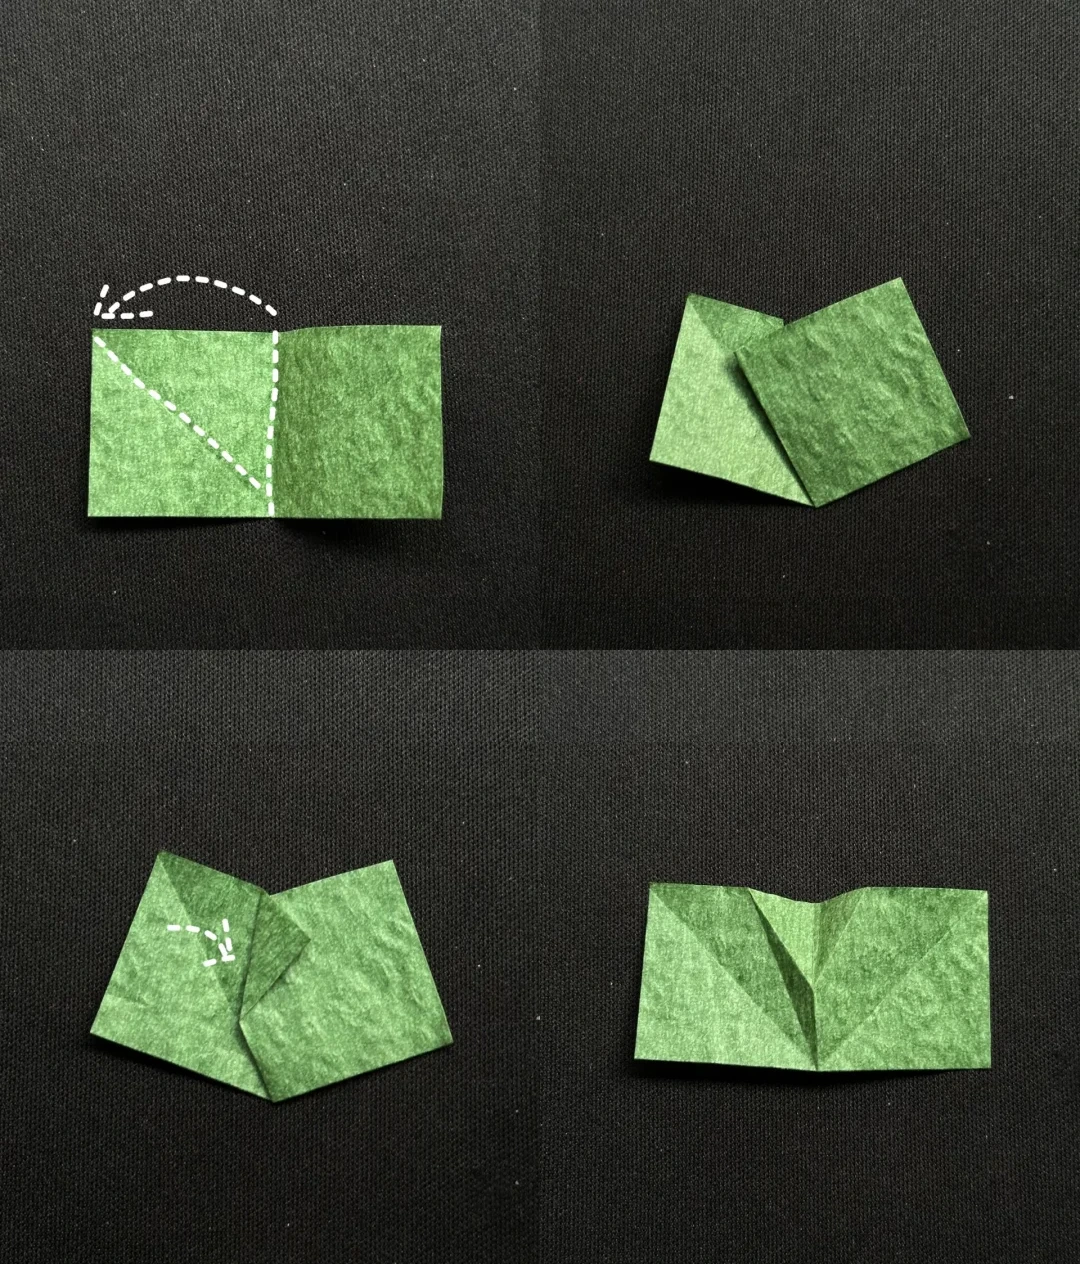
Fold so the vertical center crease aligns with the left diagonal crease, following the curved arrow. Match the angled shape shown at upper right.
Fold the small central flap toward the right, following the lower-left arrow.
Open the rectangle again, keeping the new creases.
Shape the leaf pair
 Open image at full size ↗
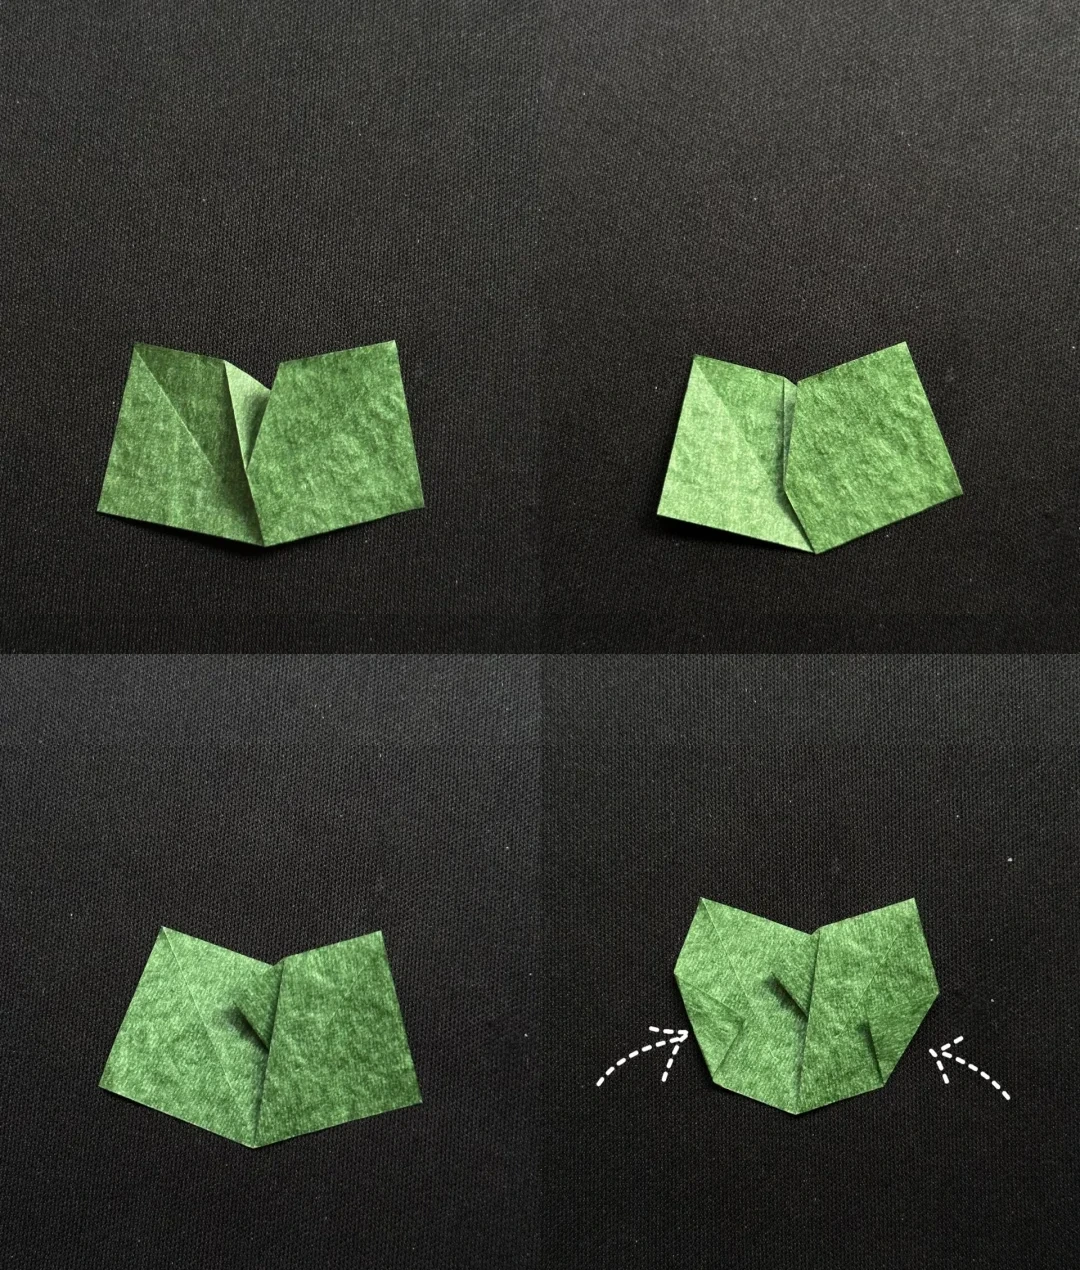
Refold along the prepared creases to form the two broad leaf shapes with a narrow fold between them. Flatten to match the upper-right picture.
Turn the leaves over.
Fold the two outer lower edges inward a little, following the arrows, to narrow and shape the leaves.
Combine the flower and leaves
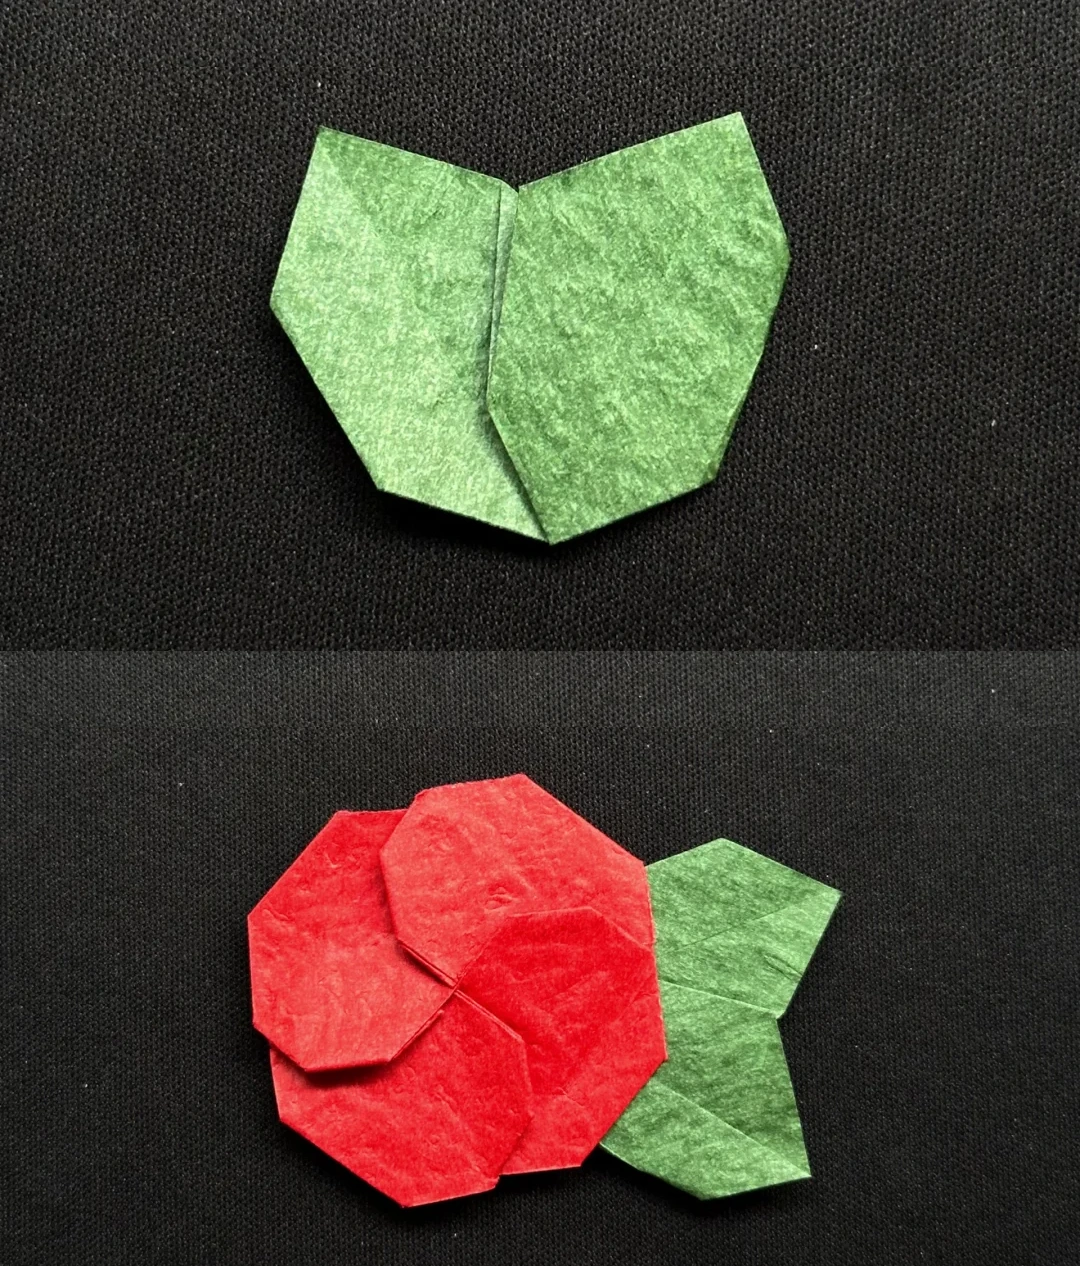 Open image at full size ↗
Turn the leaf pair back to the front and gently flatten it.
Place the camellia over the folded leaf base so both green leaves remain visible. If needed, secure the pieces with a small dab of glue on the back and let it dry.
Check the finished shape
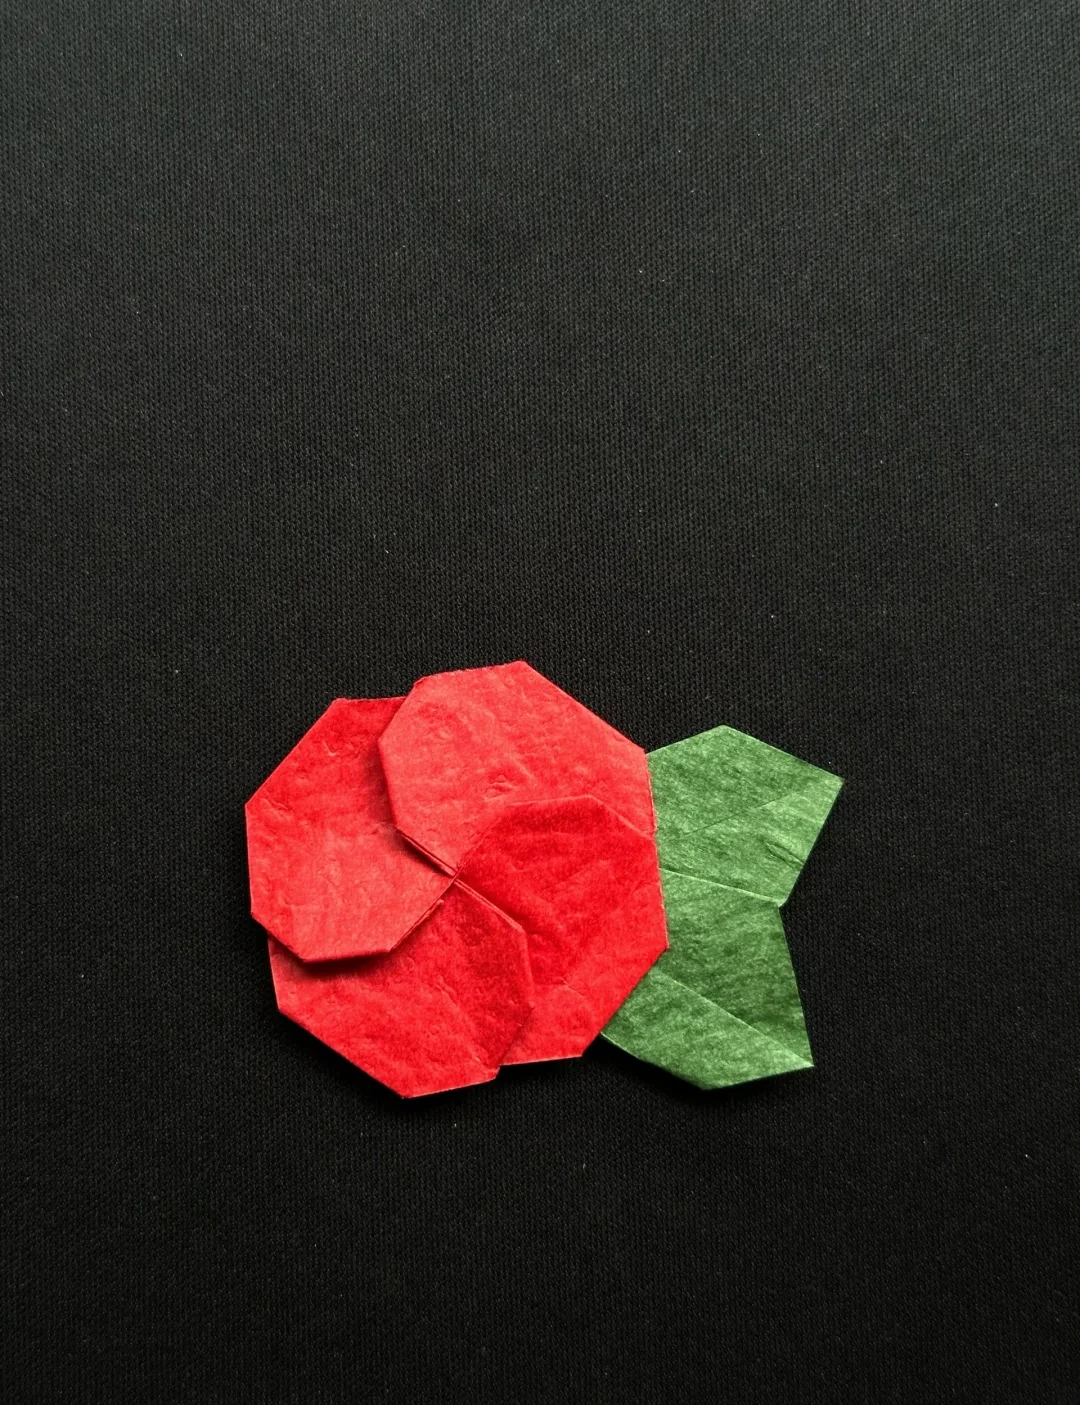 Open image at full size ↗
Keep the layered flower face visible and the two leaves neatly spread. Press bulky folds gently so the bookmark rests more comfortably between pages.
Try another flower color
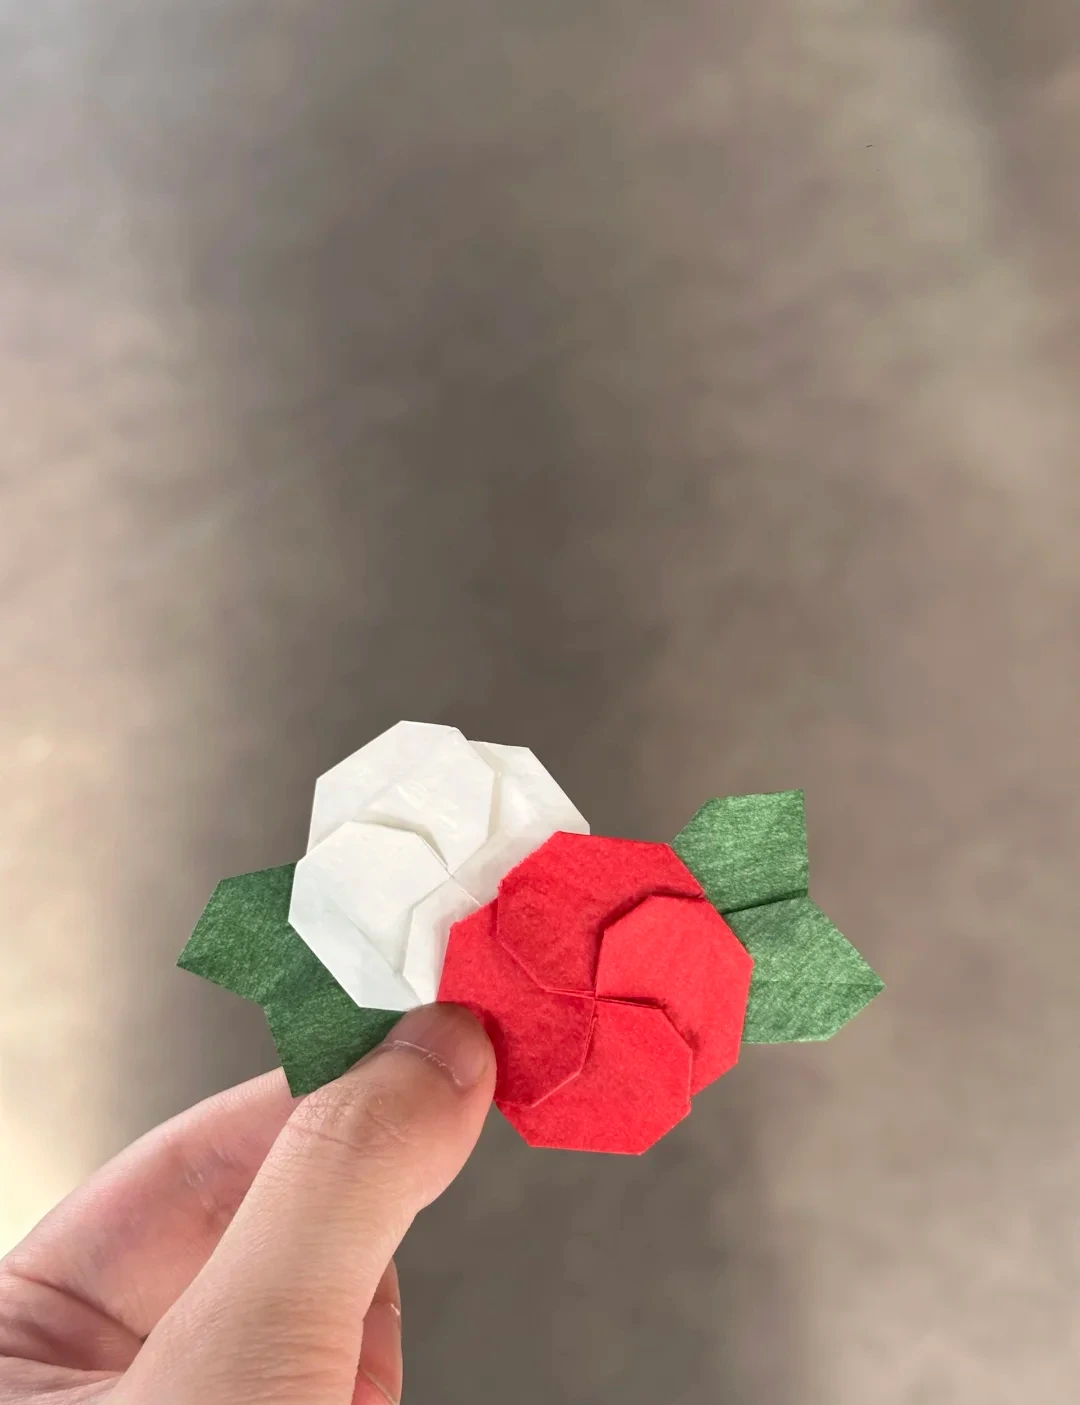 Open image at full size ↗
Make a second camellia in white or another paper color using the same sequence. Pair each flower with its own green leaf base.
Follow the diagrams alongside the step-by-step English instructions.
Choose your next project →