
Animals · Step-by-step guide
Boxy Paper Whale
Fold a three-dimensional whale with a pale belly, side fins and a raised tail.
What you’ll need
- One 15 × 15 cm paper square, colored on one side
- A folding tool, optional
Origami · Folding and shaping
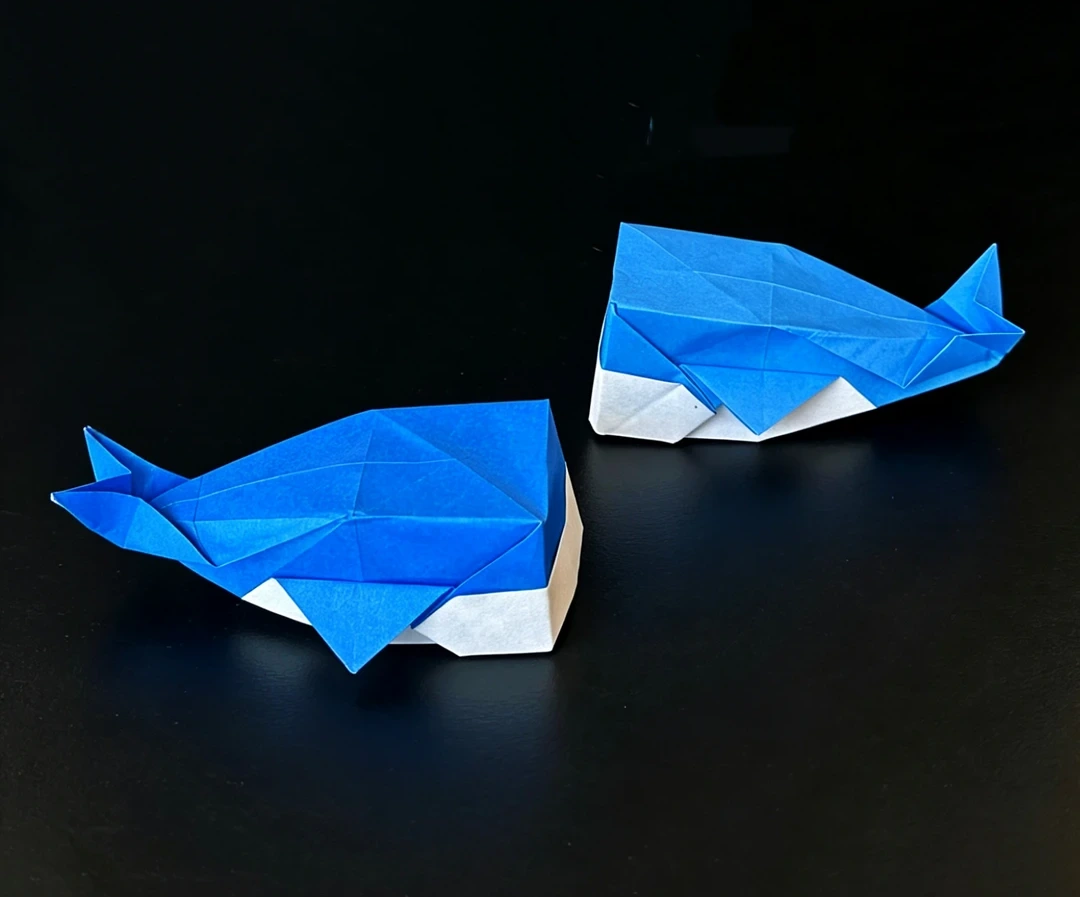
Make it, step by step.
21 steps · Original diagrams with English instructions
Read each picture from left to right, then top to bottom.
Finished model
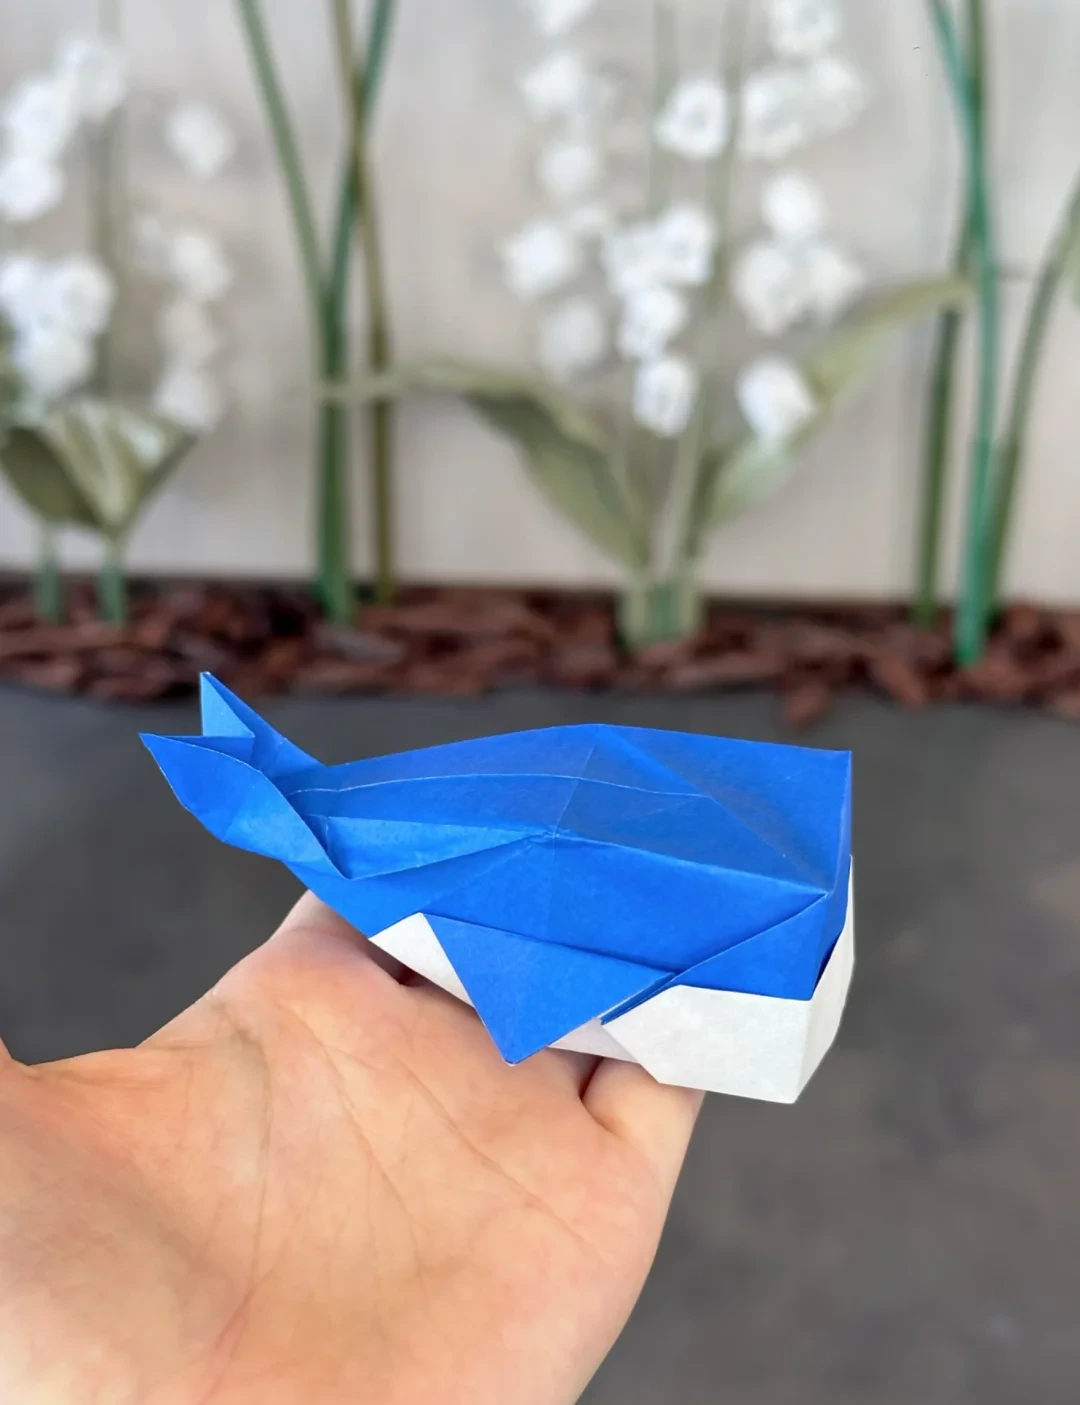 Open image at full size ↗
Use this finished example to compare the shape and proportions of your model.
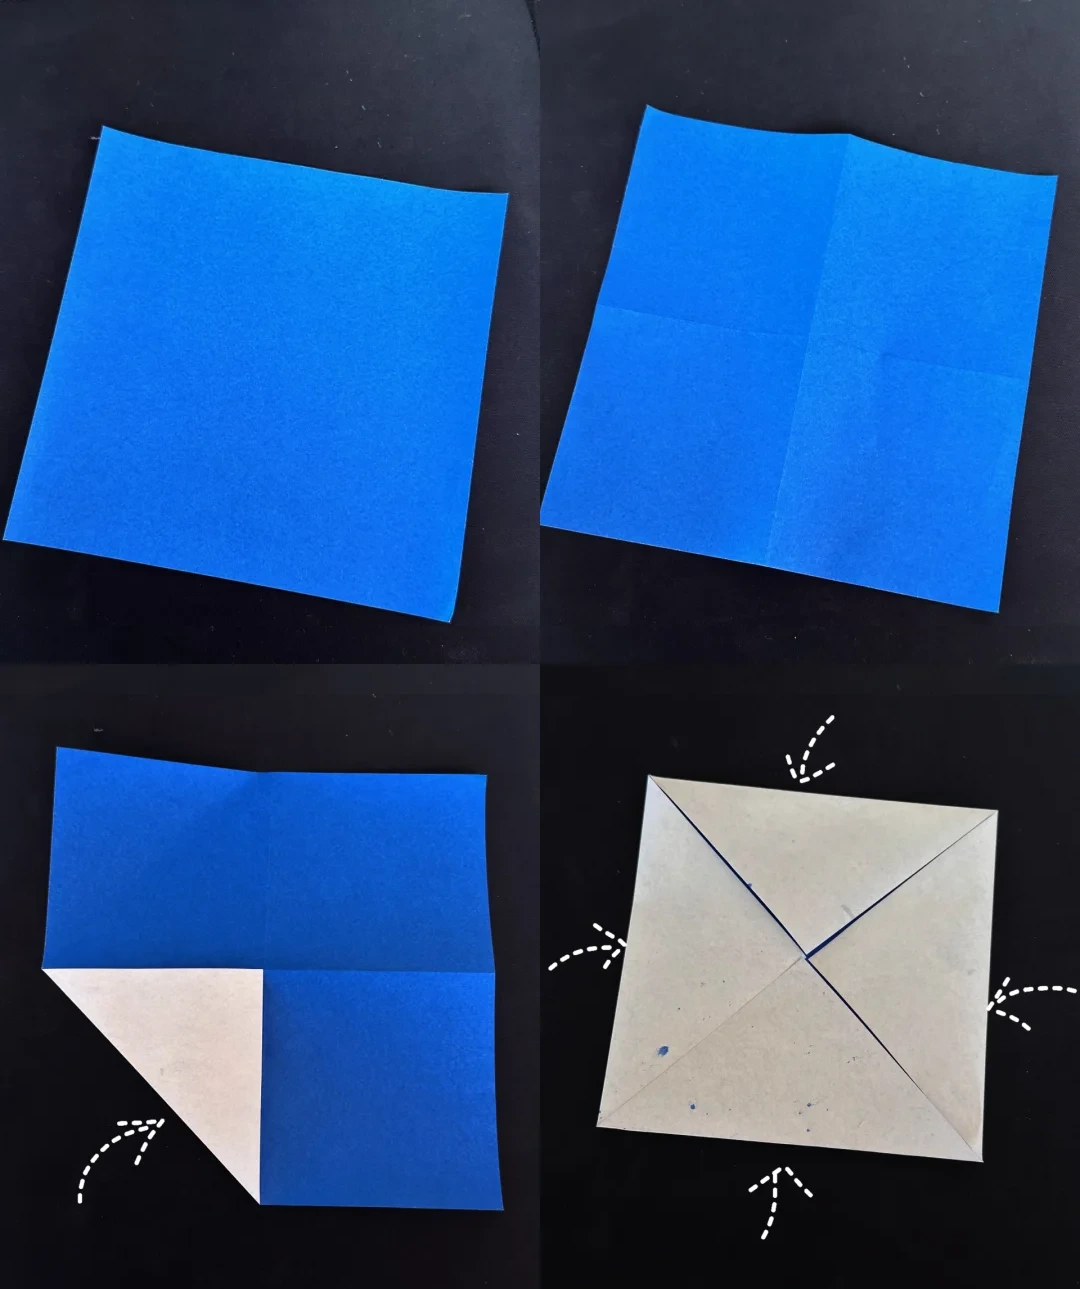
Make a smaller square
 Open image at full size ↗
Crease the square horizontally and vertically. Fold all four corners to the center.
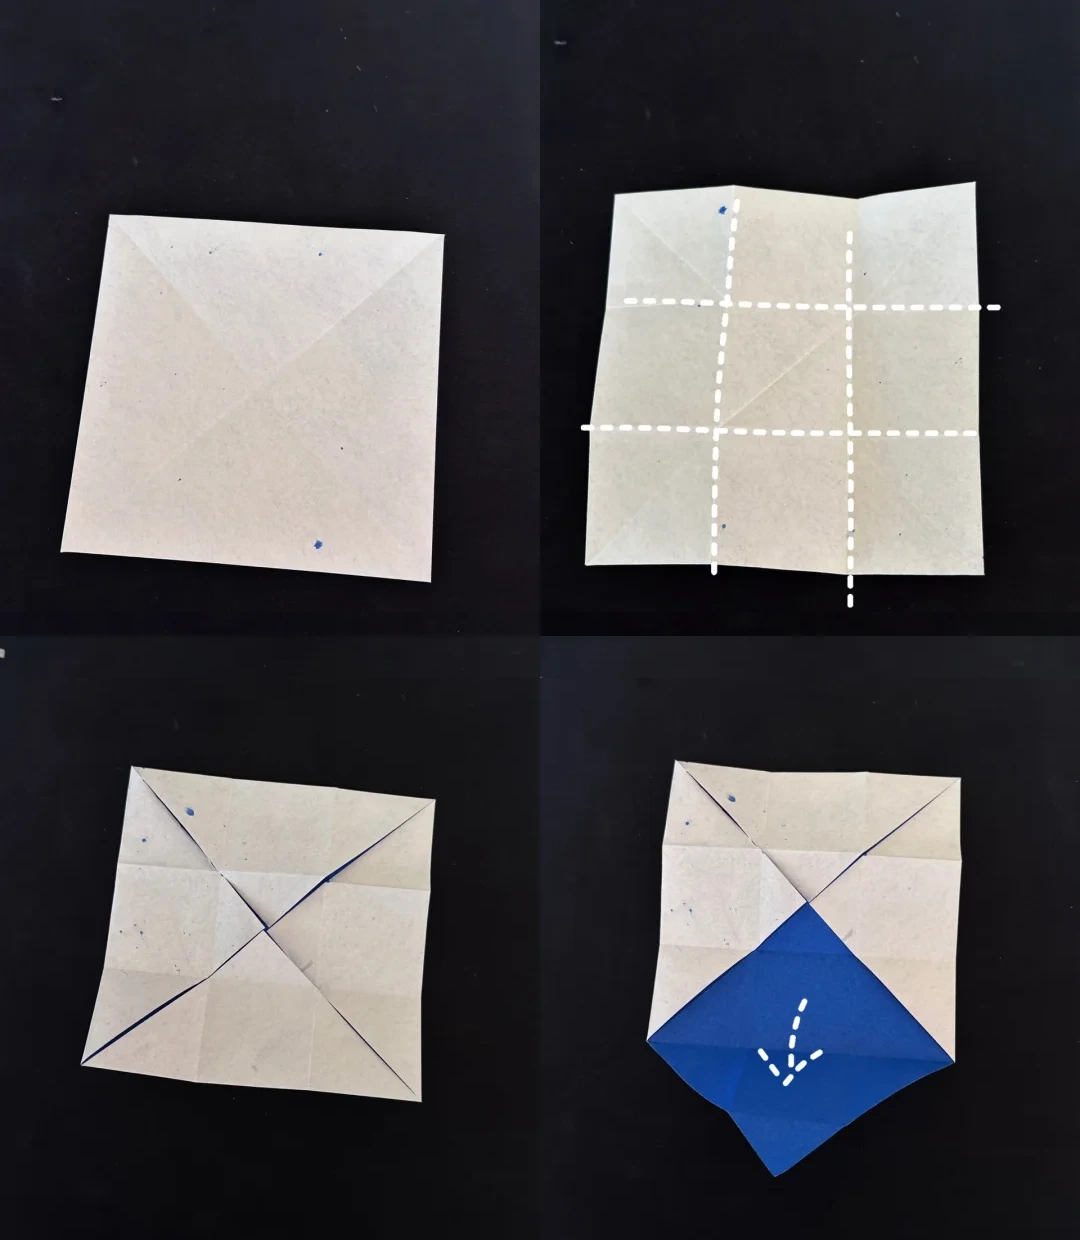
Mark a grid
 Open image at full size ↗
Turn the folded square over and crease it into thirds in both directions.
Turn it back and open the lower triangular flap downward.
Prepare the belly folds
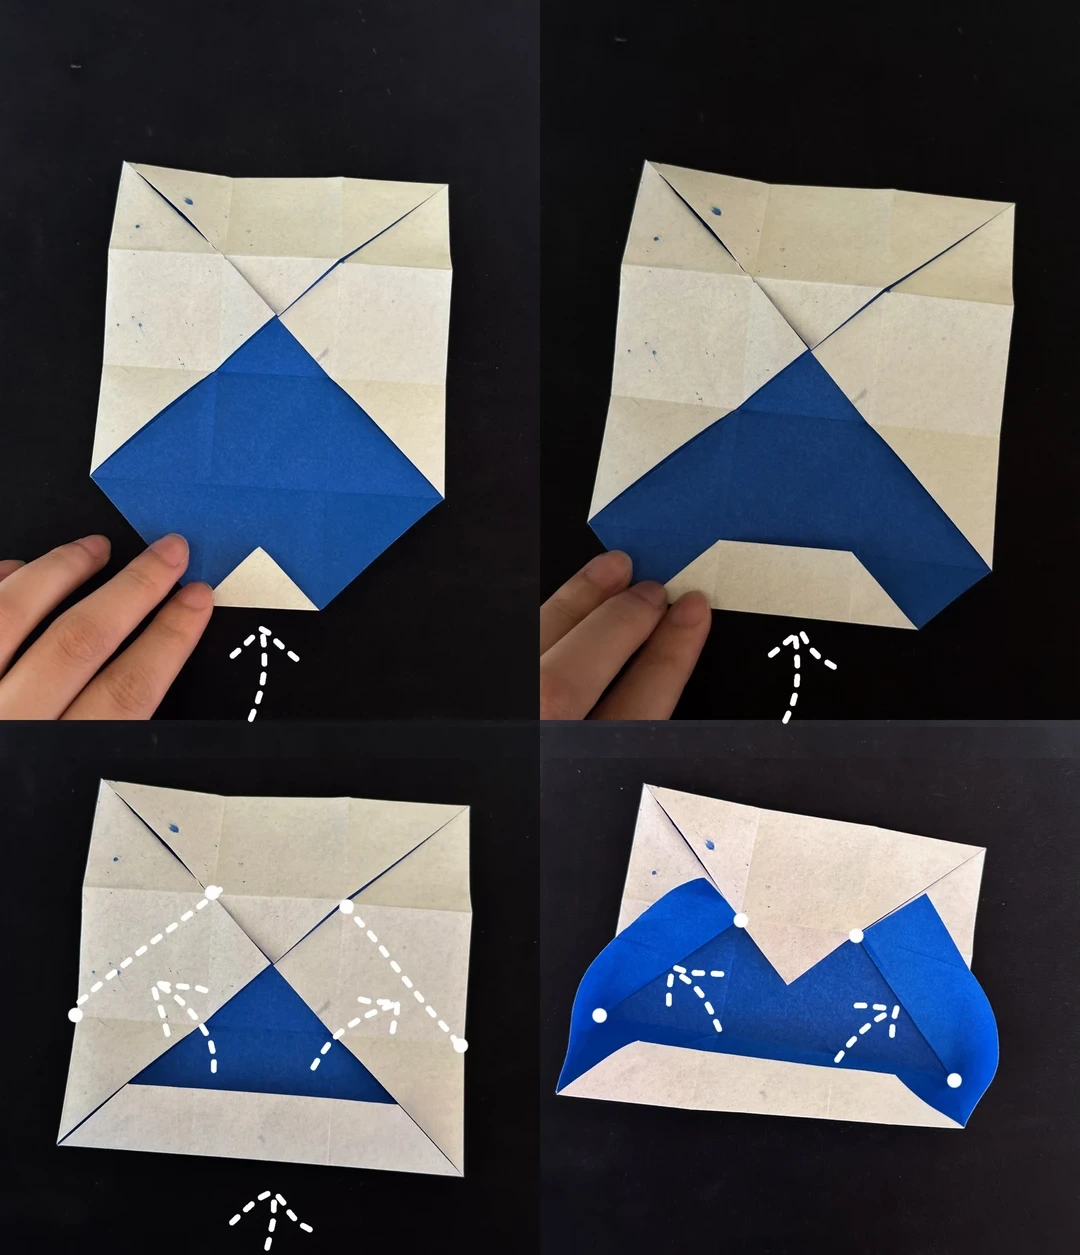 Open image at full size ↗
Fold the lower tip upward, then fold the lower edge upward again along the next guide.
Fold the lower section upward once more and bring both side sections inward along their diagonal guides.
Mark the body creases
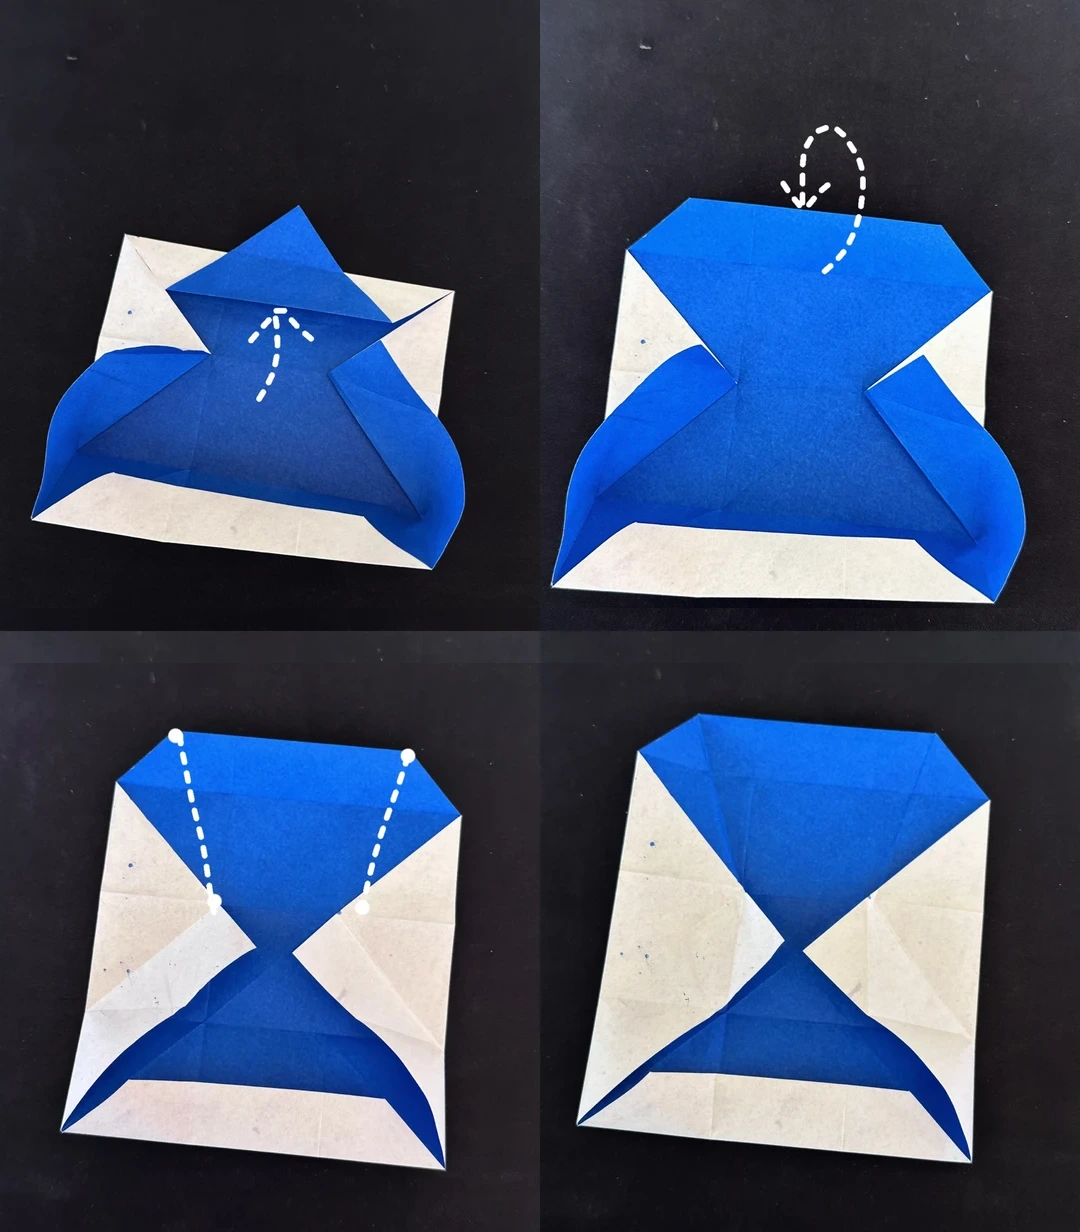 Open image at full size ↗
Fold the central section upward. Crease the two sloping lines indicated on the upper section.
Fold the upper point behind, then reinforce the indicated guide creases.
Precrease the reverse
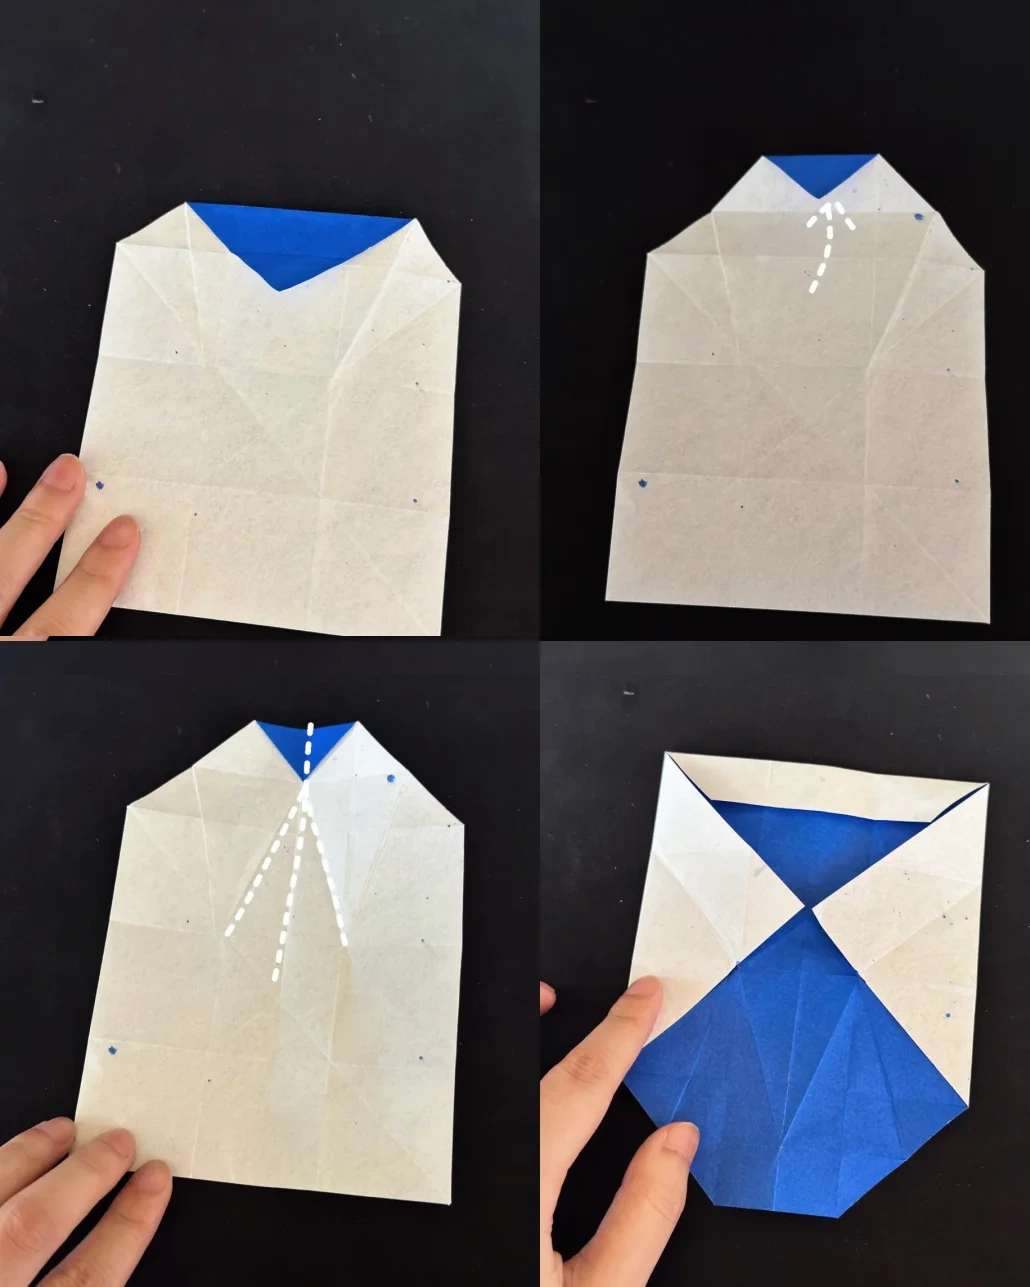 Open image at full size ↗
Turn the paper over and mark the horizontal fold near the top. Fold the small upper point upward.
Mark both long sloping creases, then return to the front.
Collapse the body
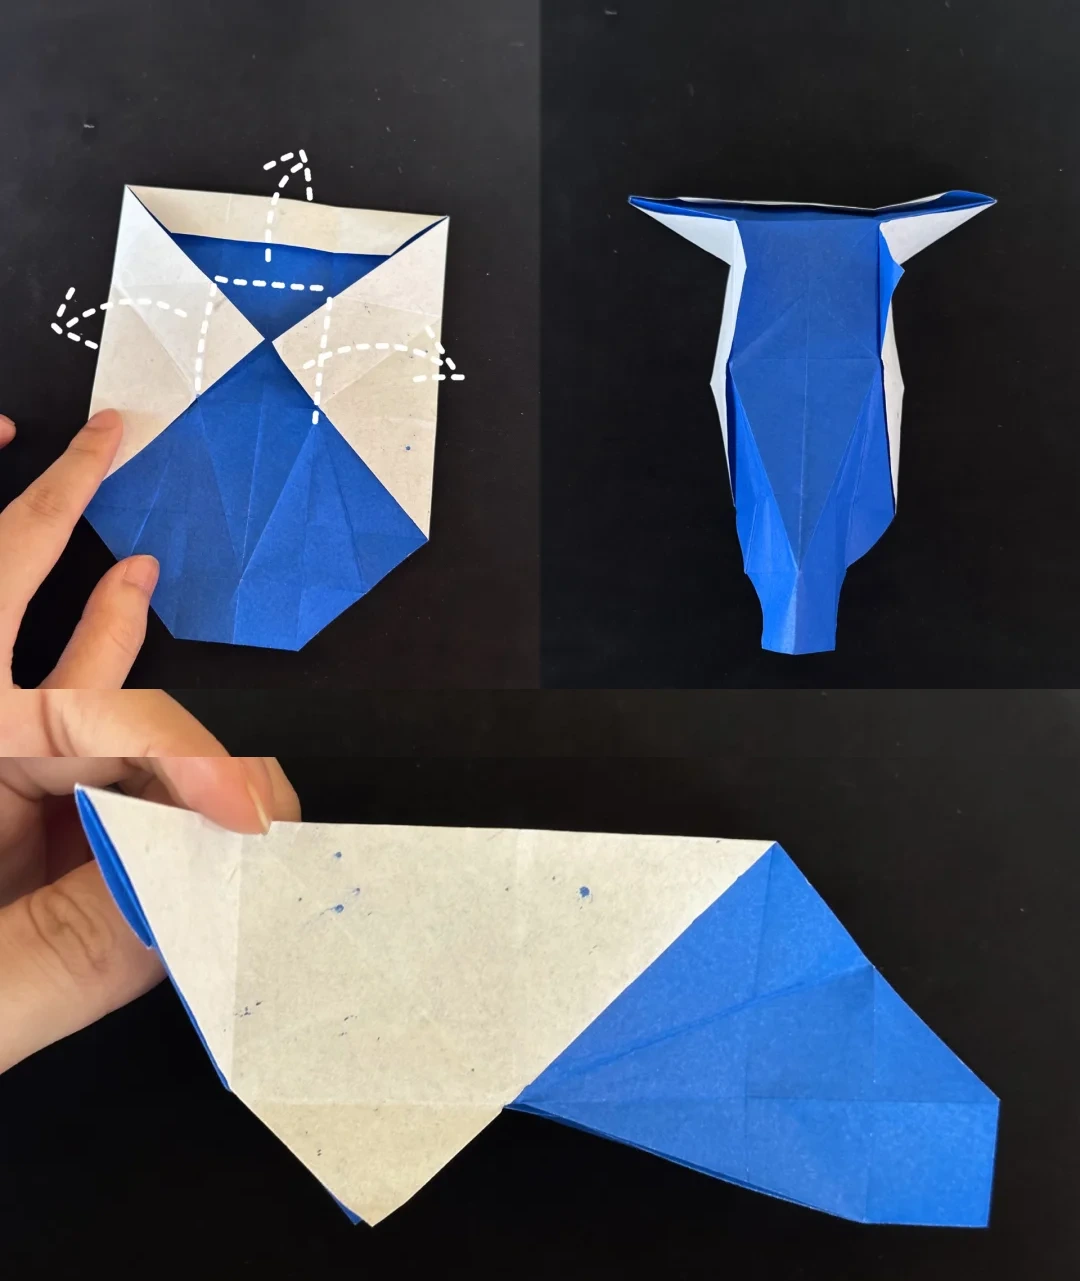 Open image at full size ↗
Fold down along the marked creases while bringing the side sections inward.
Begin flattening from one side, keeping the colored outer layer and pale belly aligned as shown.
Arrange the side layers
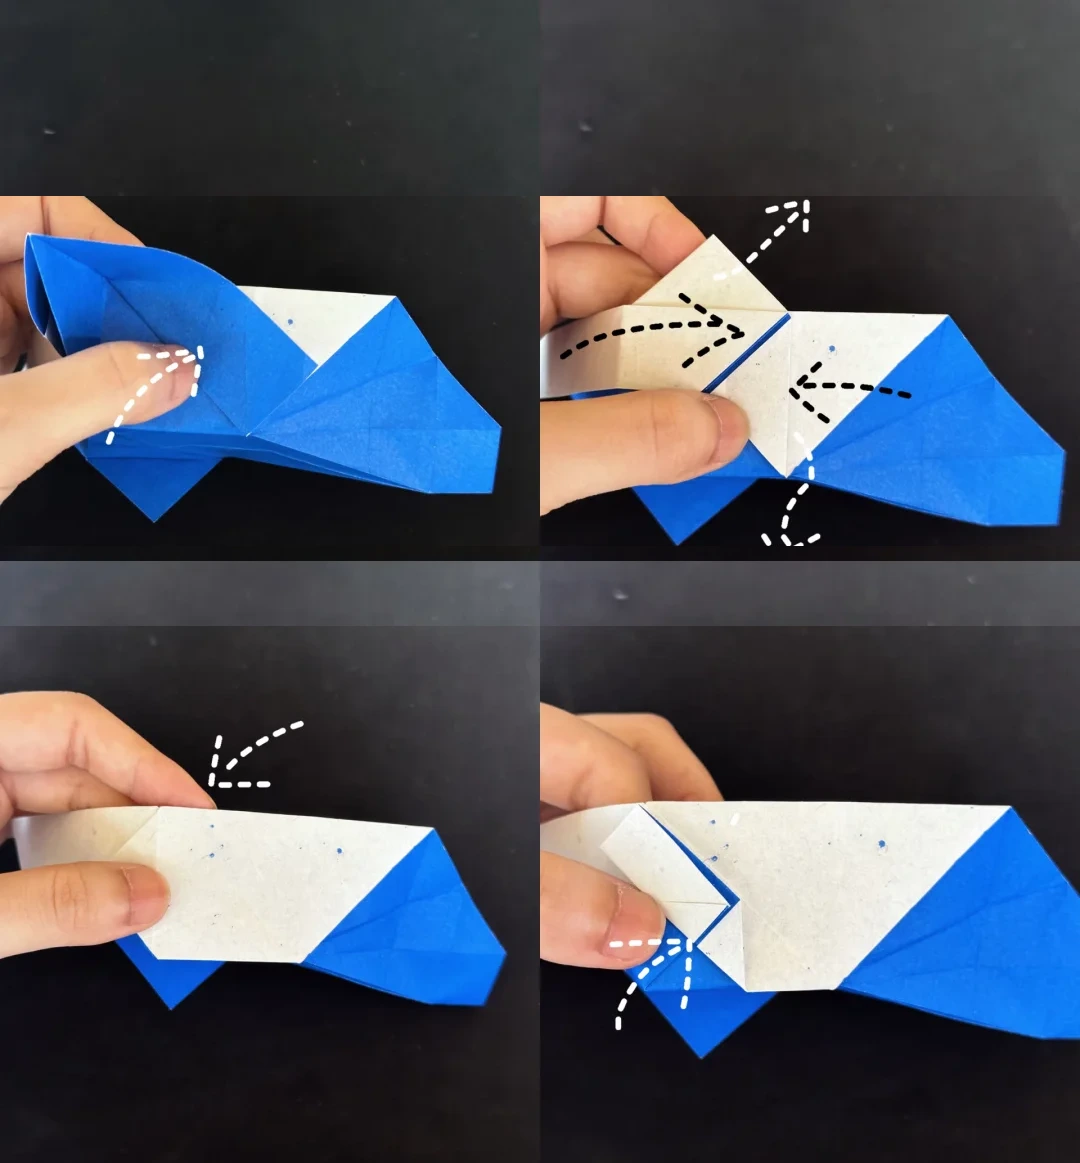 Open image at full size ↗
Fold the indicated layer to the right, lower it to the left, and return the next layer to the right.
Fold back to the left and then fold the small section in half along its guide.
Form the side fins
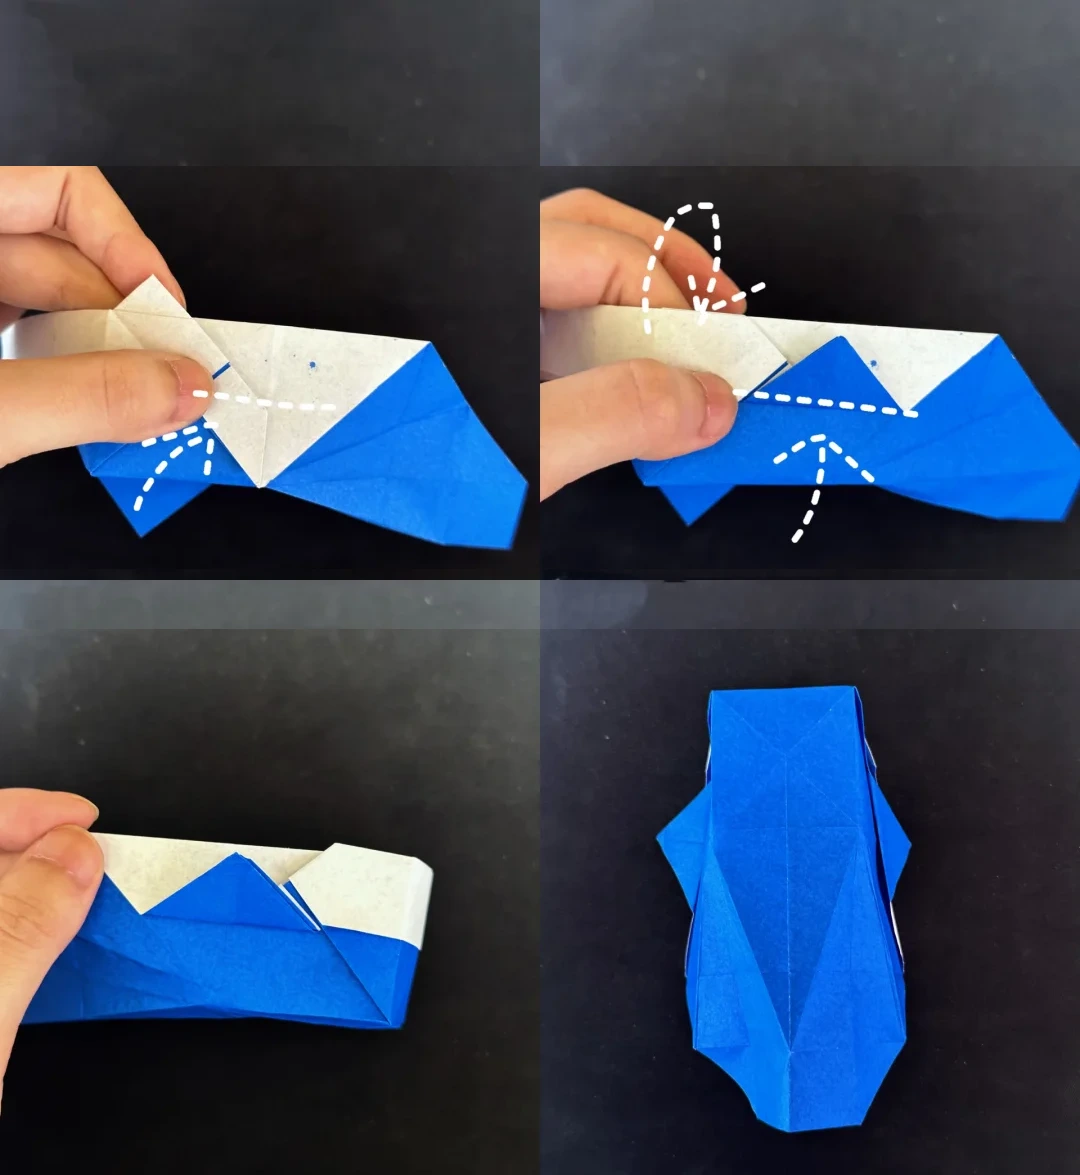 Open image at full size ↗
Fold the small triangle behind. Fold the adjacent layer to the right and repeat on the other face.
Lift the indicated edge upward along its crease, then view the model from above.
Shape the tail end
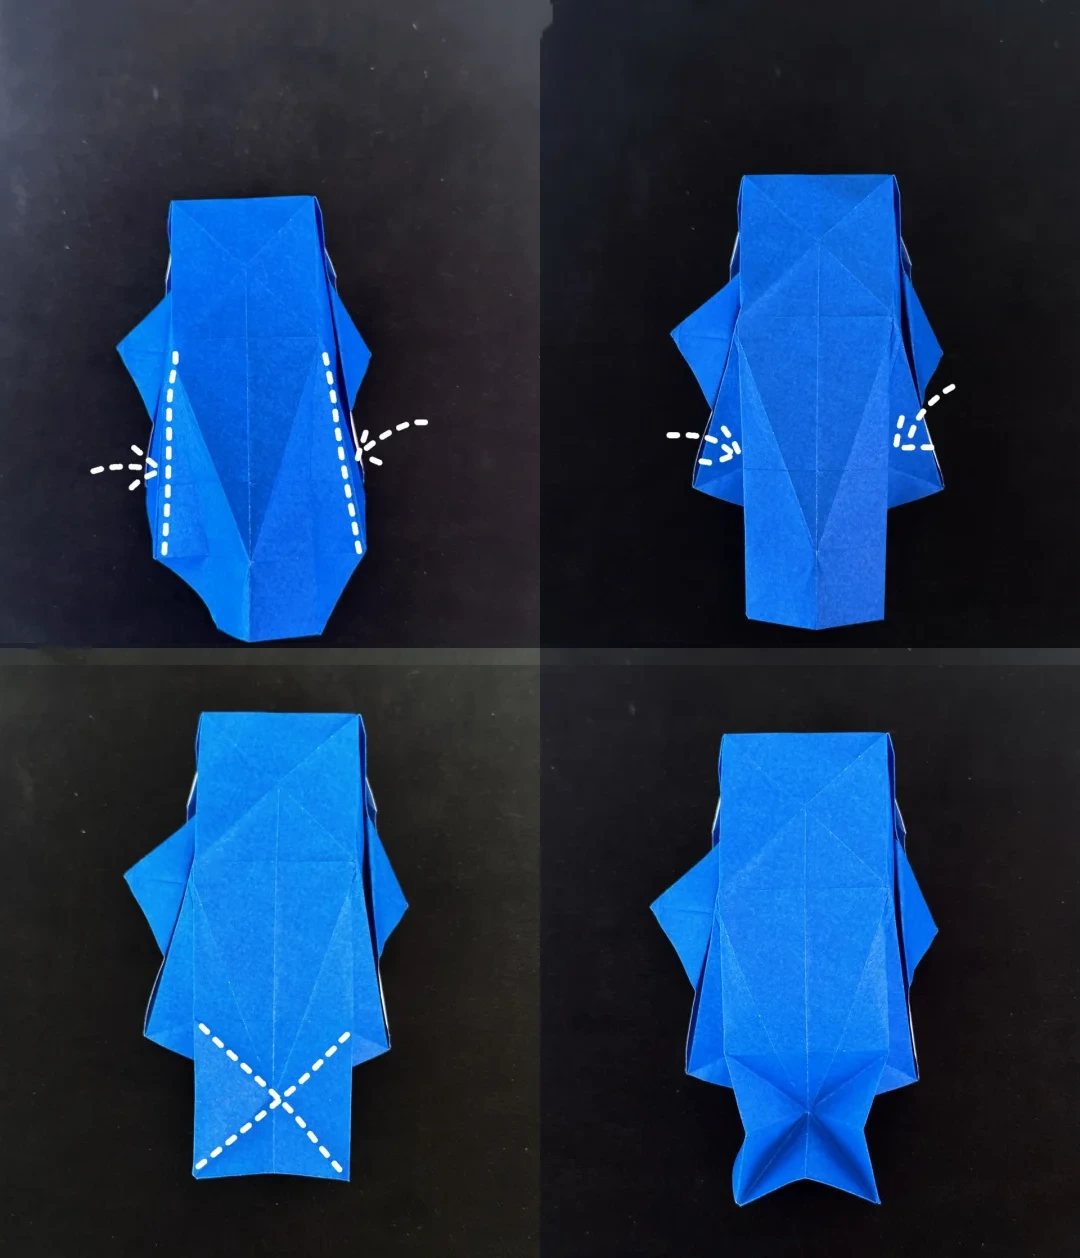 Open image at full size ↗
Fold the two sides inward along the long creases. Mark the two crossing diagonals near the tail end.
Collapse that end along the mountain and valley folds shown to bring out the two tail points.
Refine the body edges
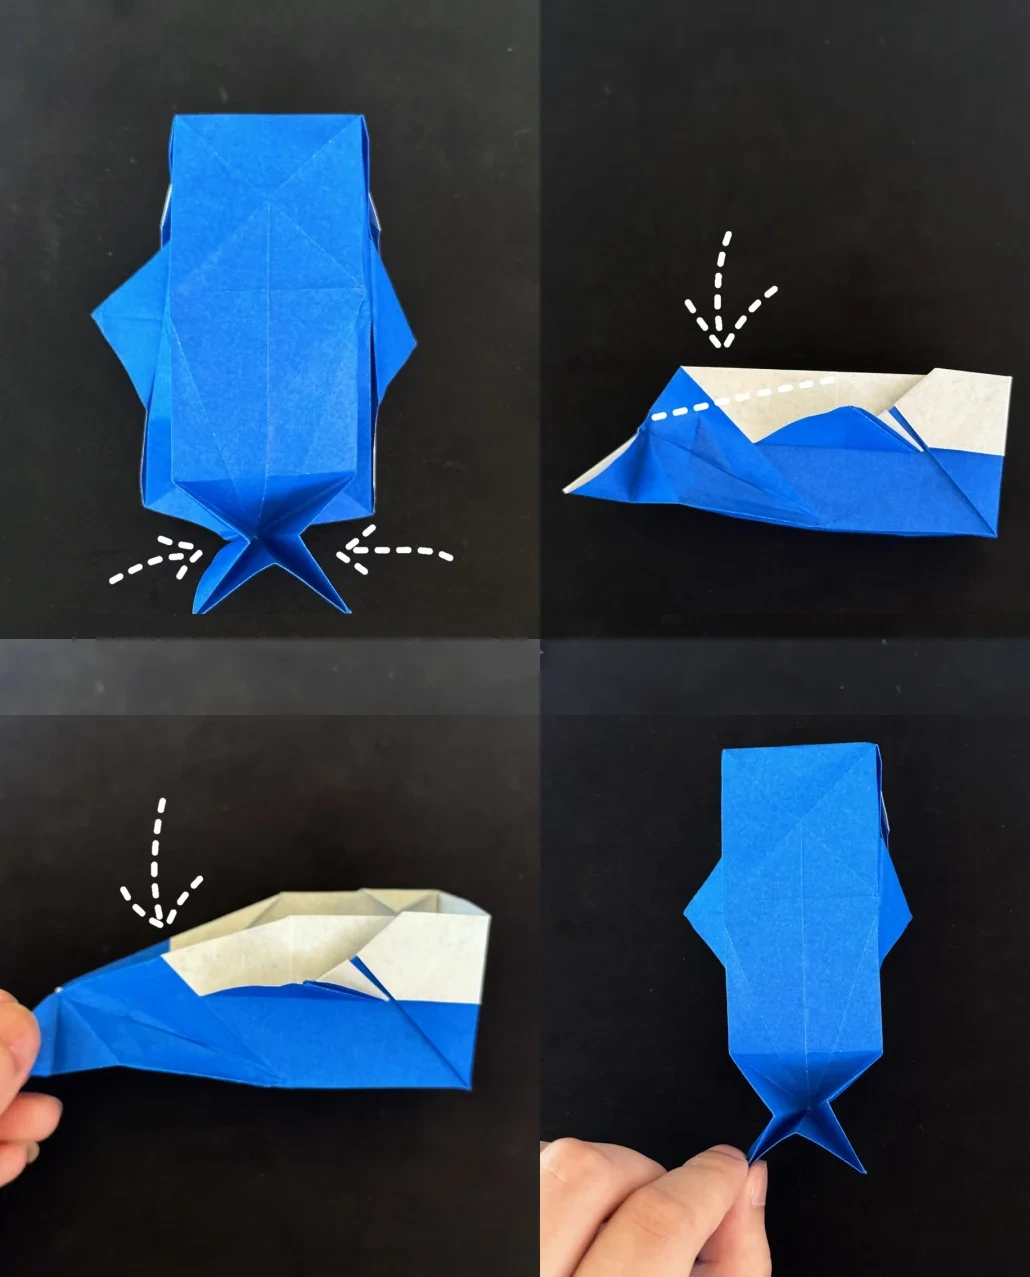 Open image at full size ↗
Fold both tail-side edges inward. Repeat the side adjustment on the other face.
Fold the upper body edge behind along the guide and return to the top view.
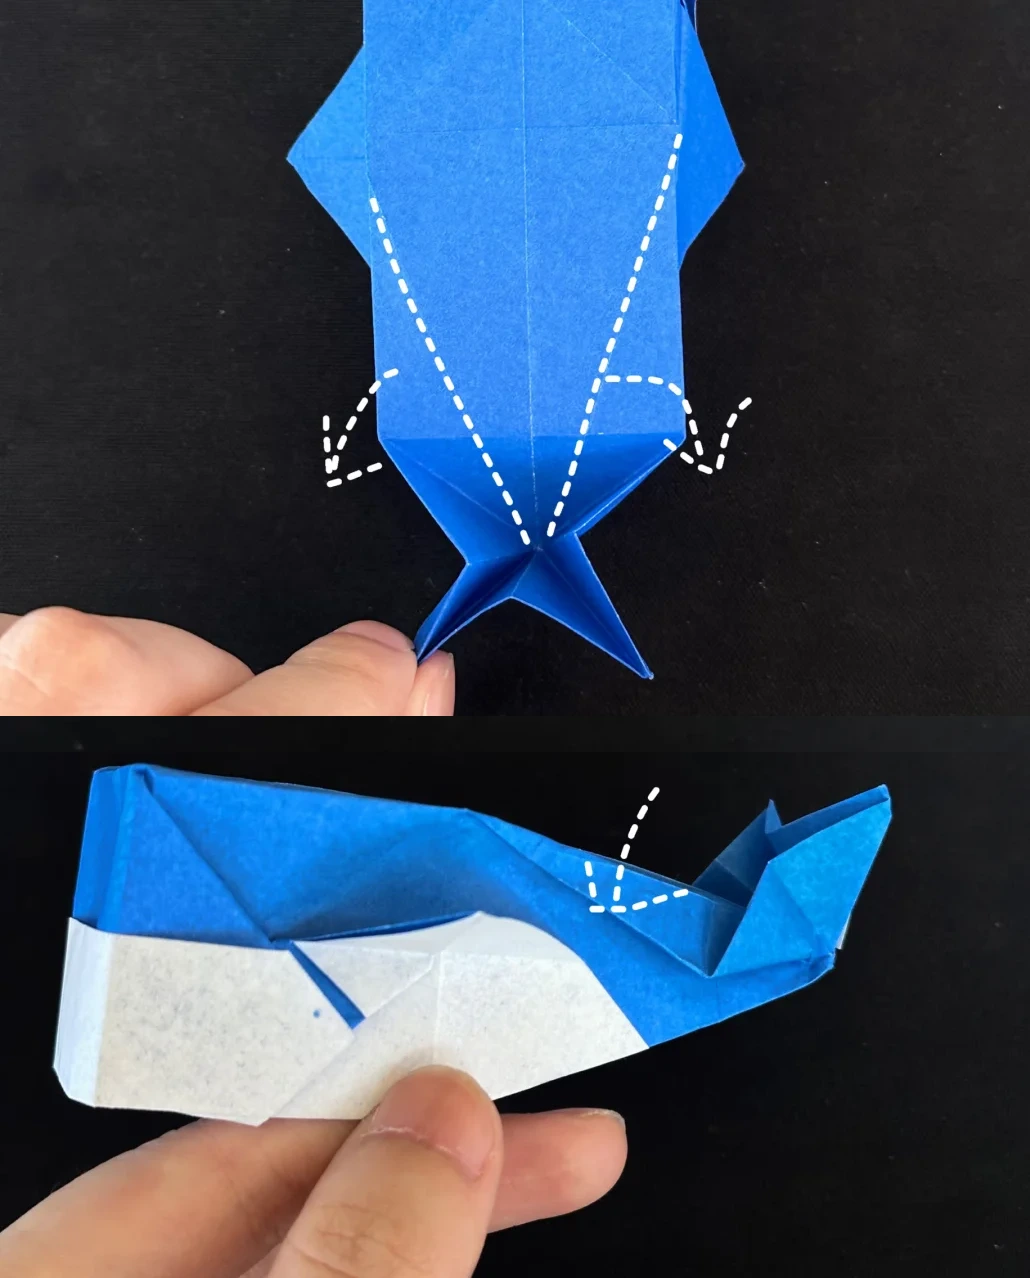
Raise the tail
 Open image at full size ↗
Fold both rear sections downward along the long diagonal guides.
From the side, adjust the fold at the tail base so the tail points upward and the box-shaped body stays open.
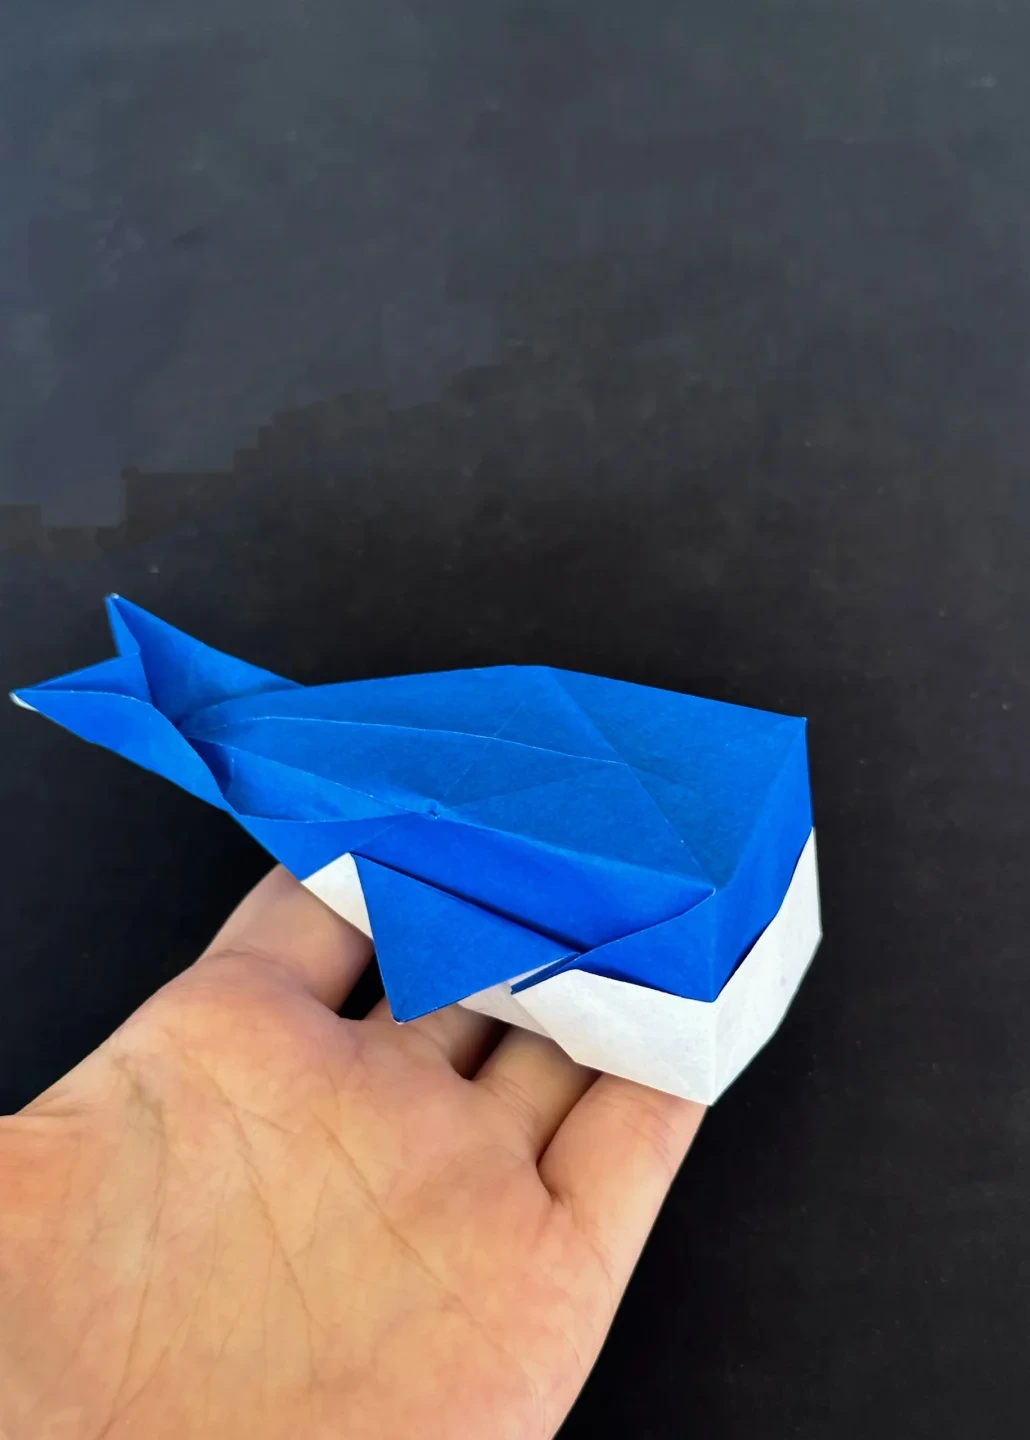
Finished model
 Open image at full size ↗
Use this finished example to compare the shape and proportions of your model.
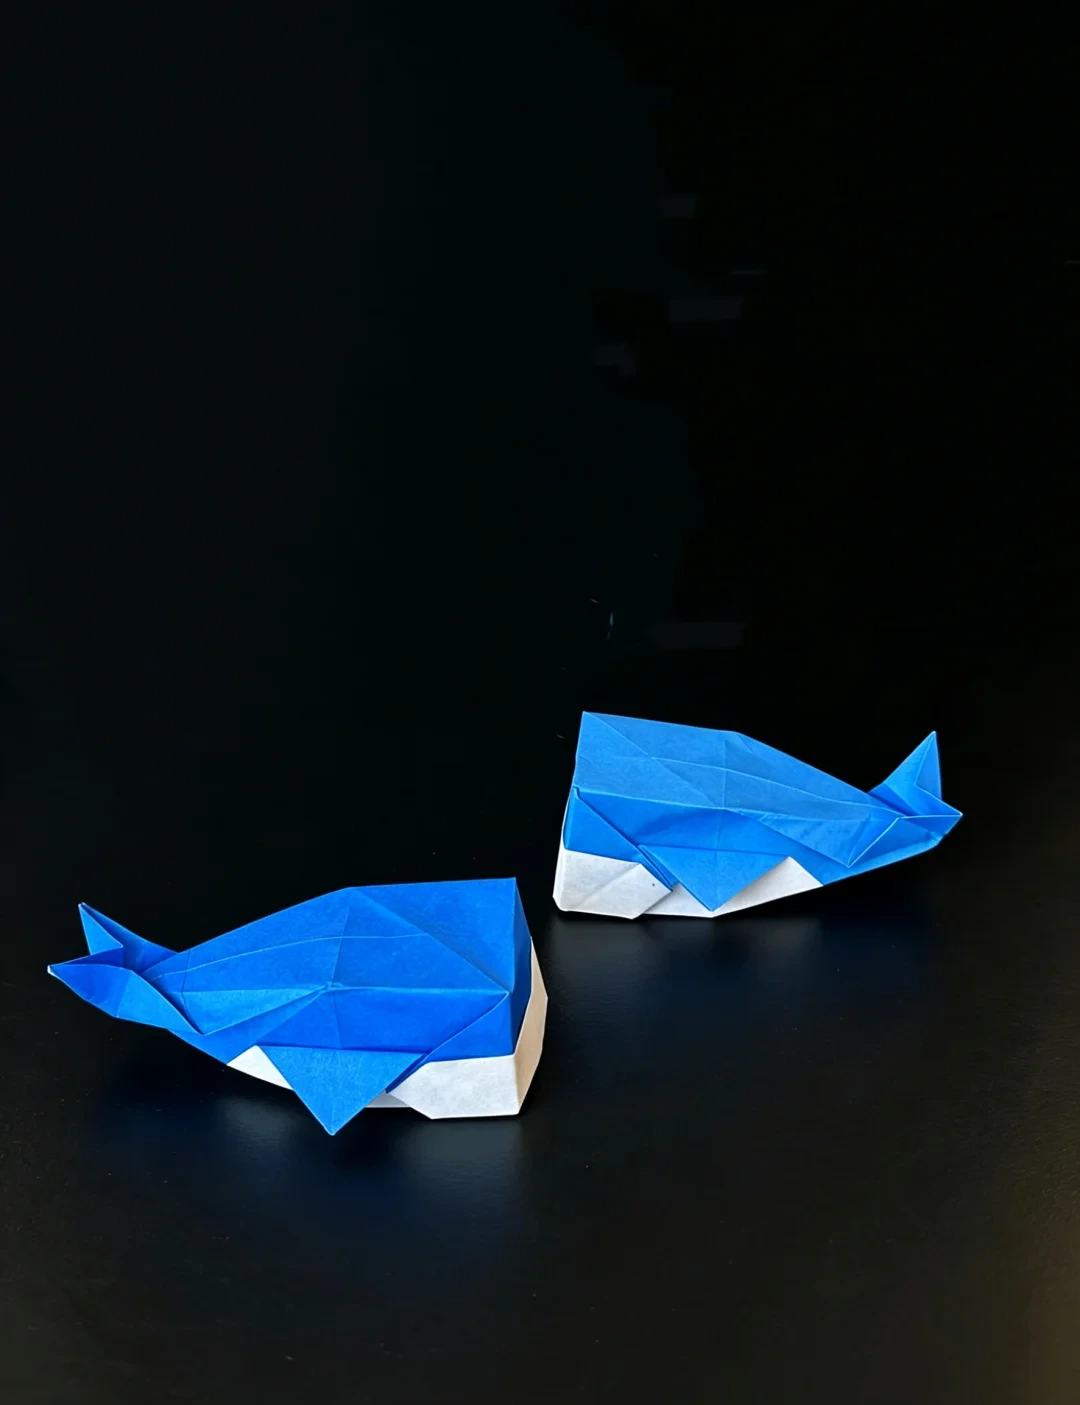
Finished model
 Open image at full size ↗
Use this finished example to compare the shape and proportions of your model.
Follow the diagrams alongside the step-by-step English instructions.
Choose your next project →