
Animals · Step-by-step guide
Angular Paper Butterfly
Make a butterfly with crisp upper wings and two slender lower wings from a paper rectangle.
What you’ll need
- One paper rectangle cut from half a square
- Scissors, if starting with a square
Paper craft · Folding and assembly
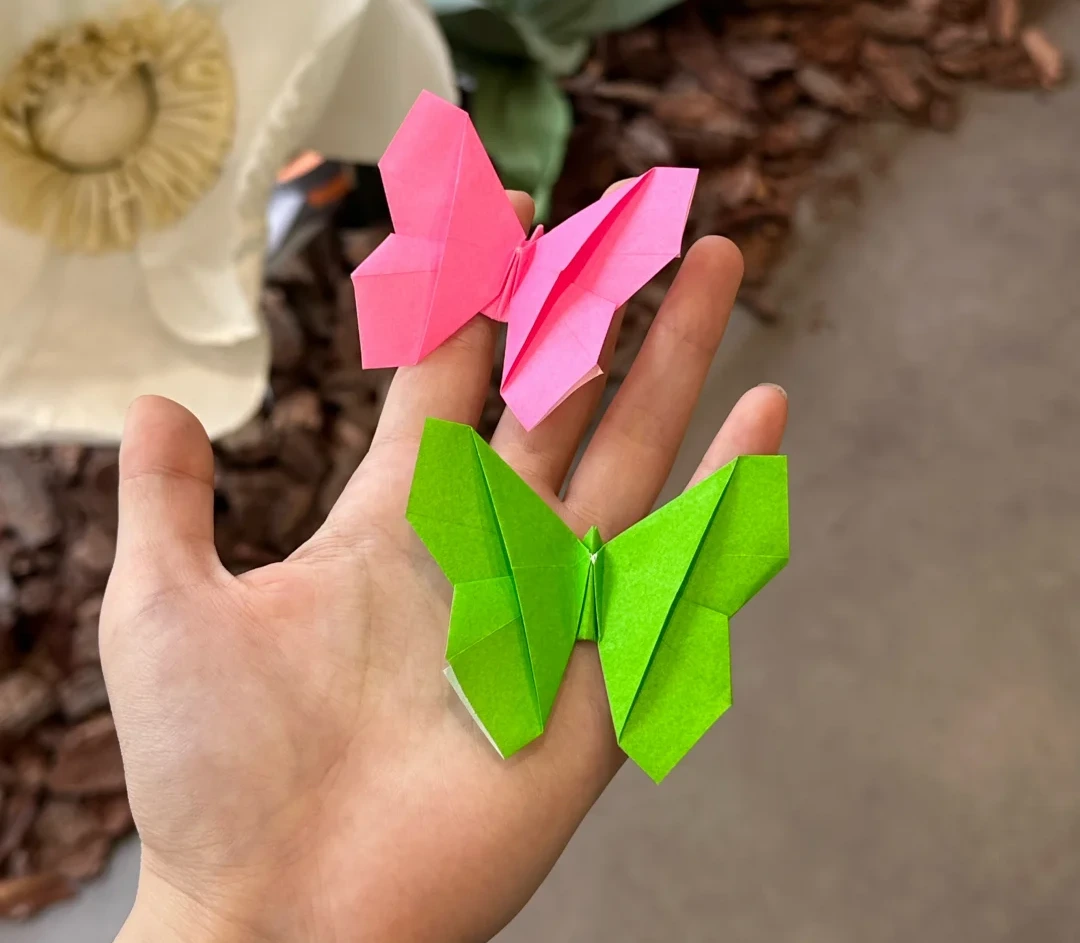
Make it, step by step.
15 steps · Original diagrams with English instructions
Read each picture from left to right, then top to bottom.
Finished model
 Open image at full size ↗
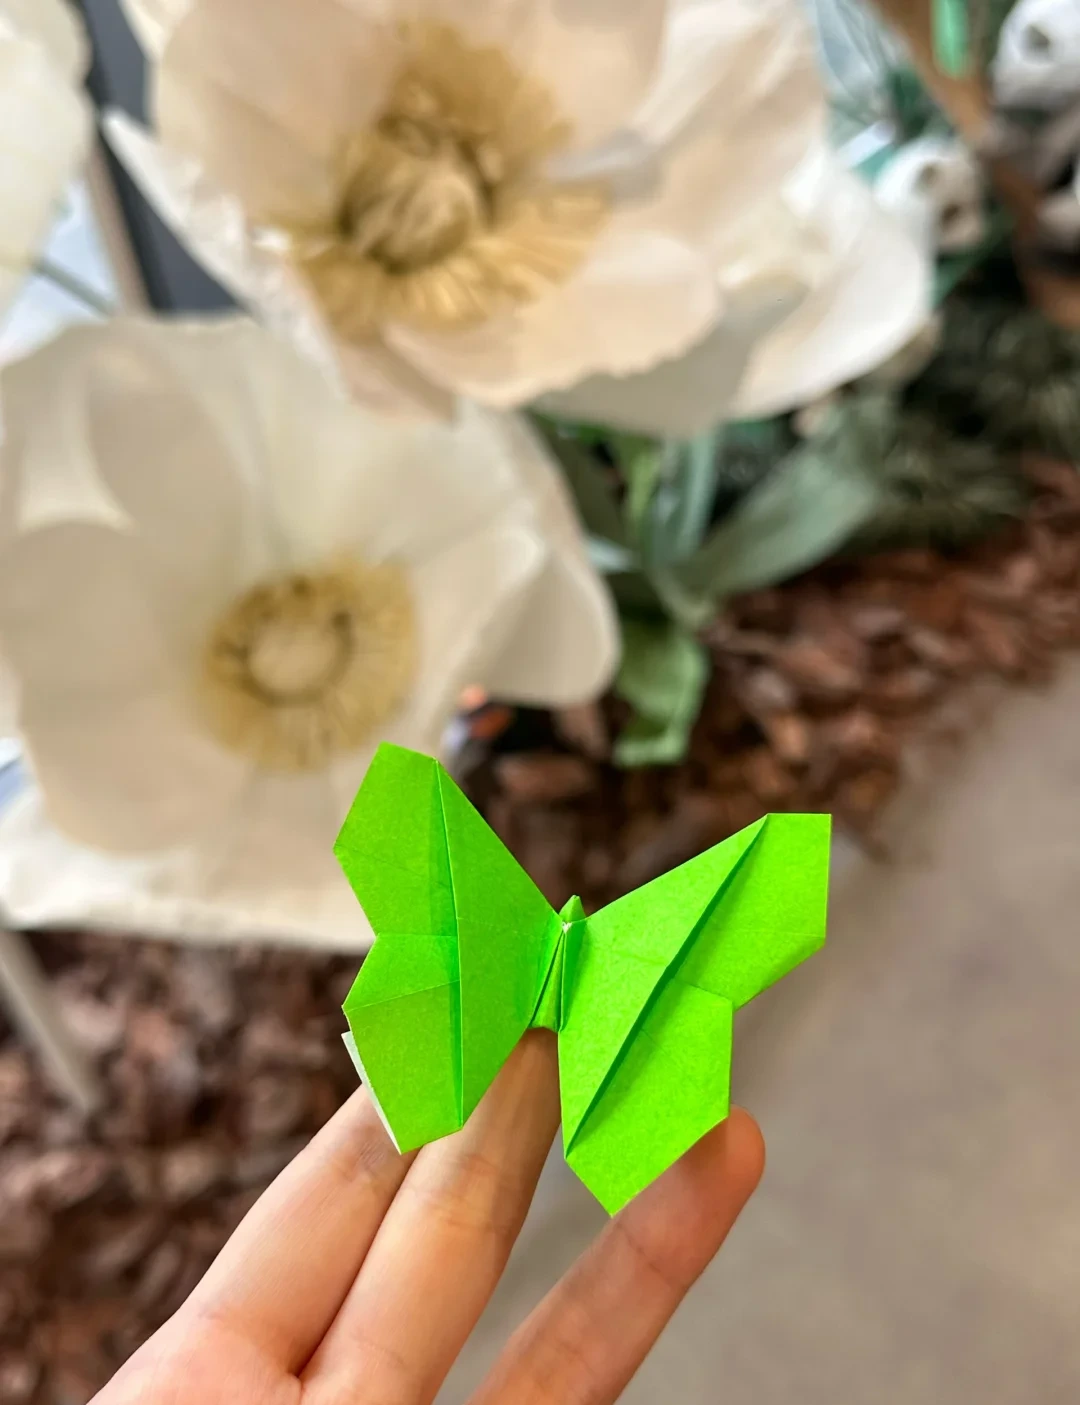
Use this finished example to compare the shape and proportions of your model.
Finished model
 Open image at full size ↗
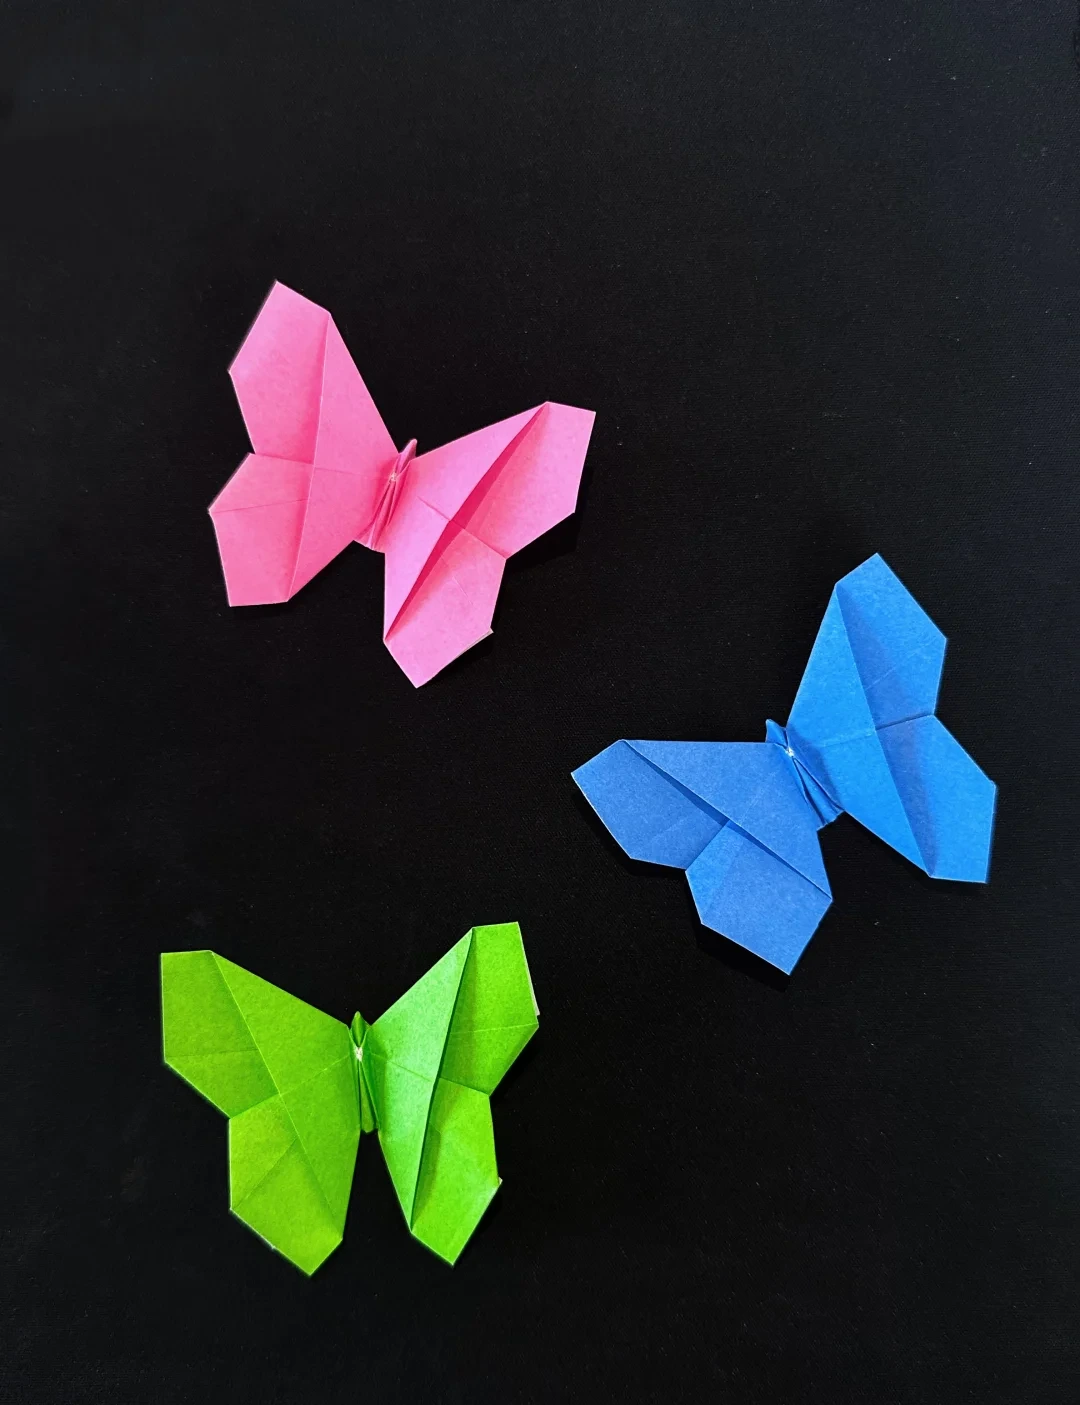
Use this finished example to compare the shape and proportions of your model.
Prepare the rectangle
 Open image at full size ↗
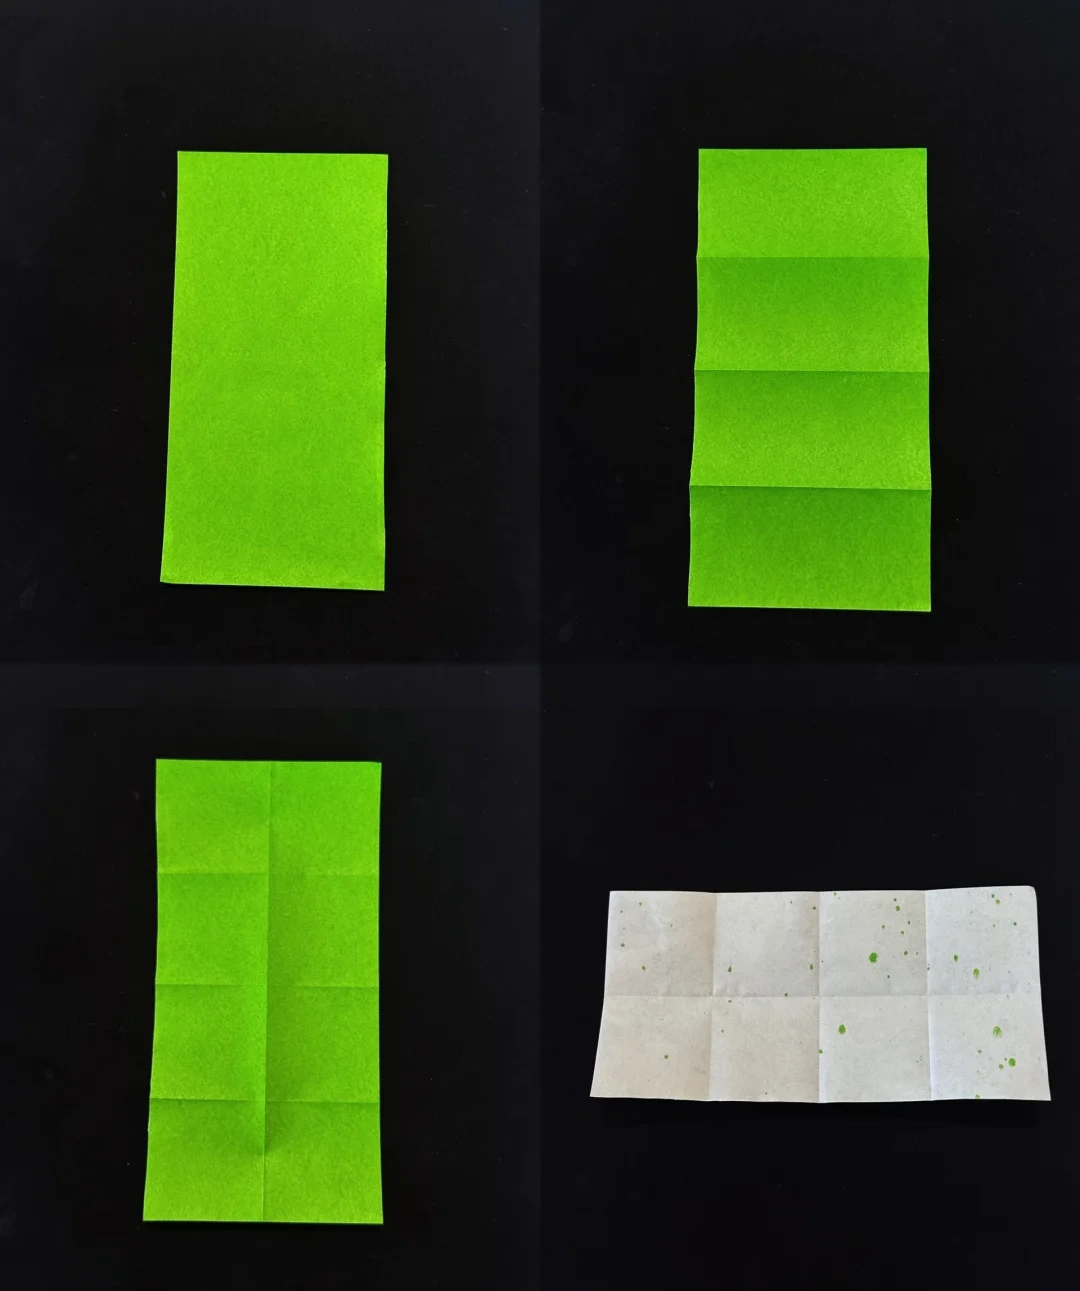
Cut a square in half to make a rectangle. With the long side vertical, crease it into four equal sections across its height.
Fold it in half lengthwise and unfold. Turn it over and place the long side horizontally.
Mark the diagonal folds
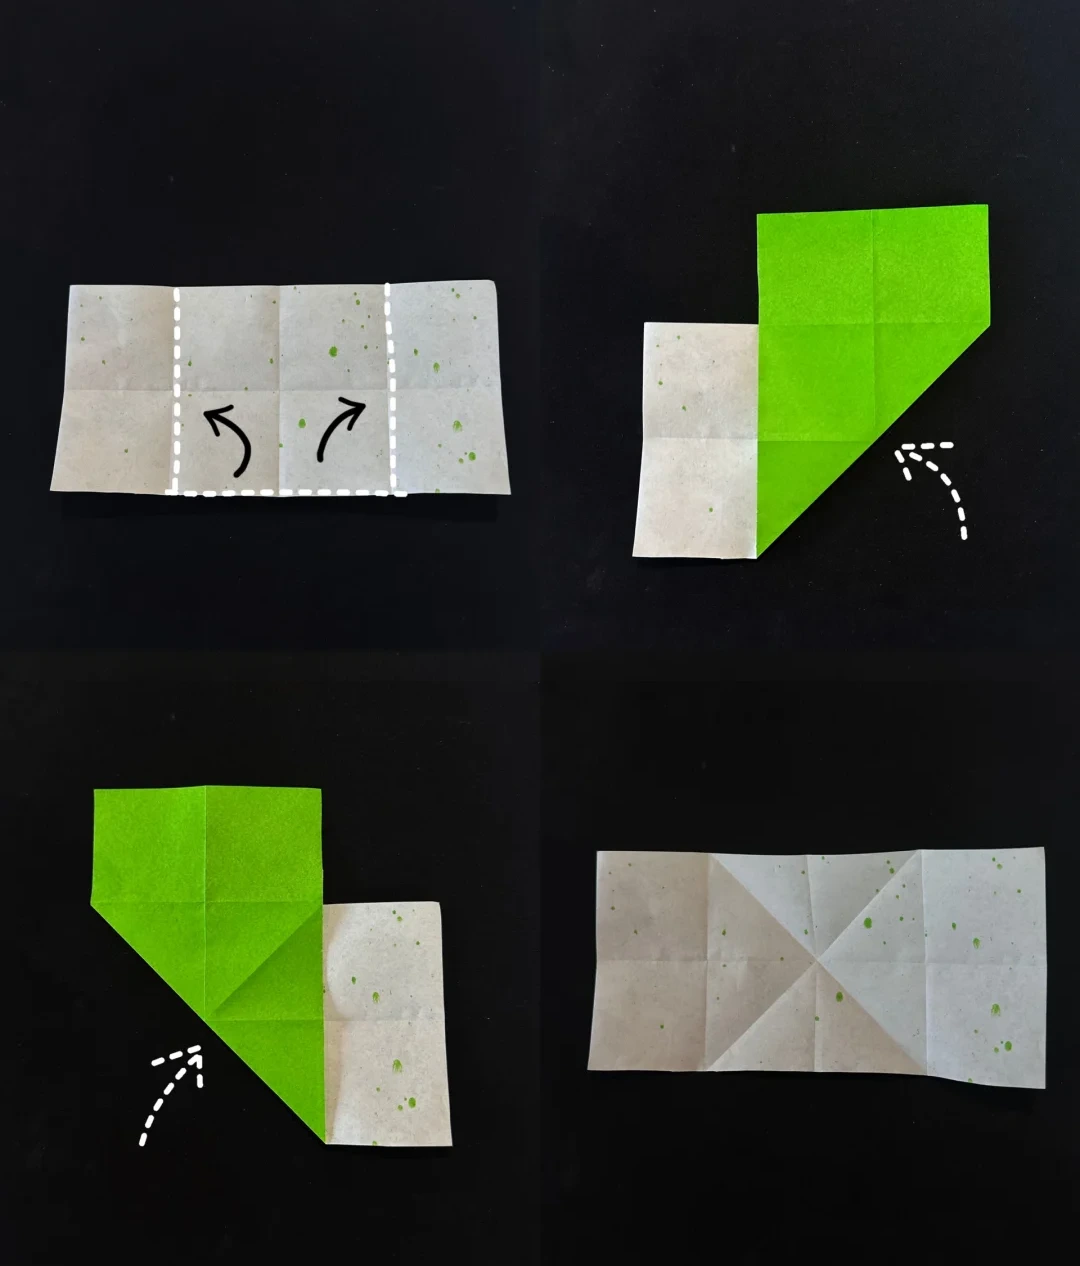 Open image at full size ↗
Bring the lower edge toward the right-hand guide, crease diagonally, and open. Repeat toward the left-hand guide.
Unfold both diagonal folds so they cross as shown.
Collapse the center
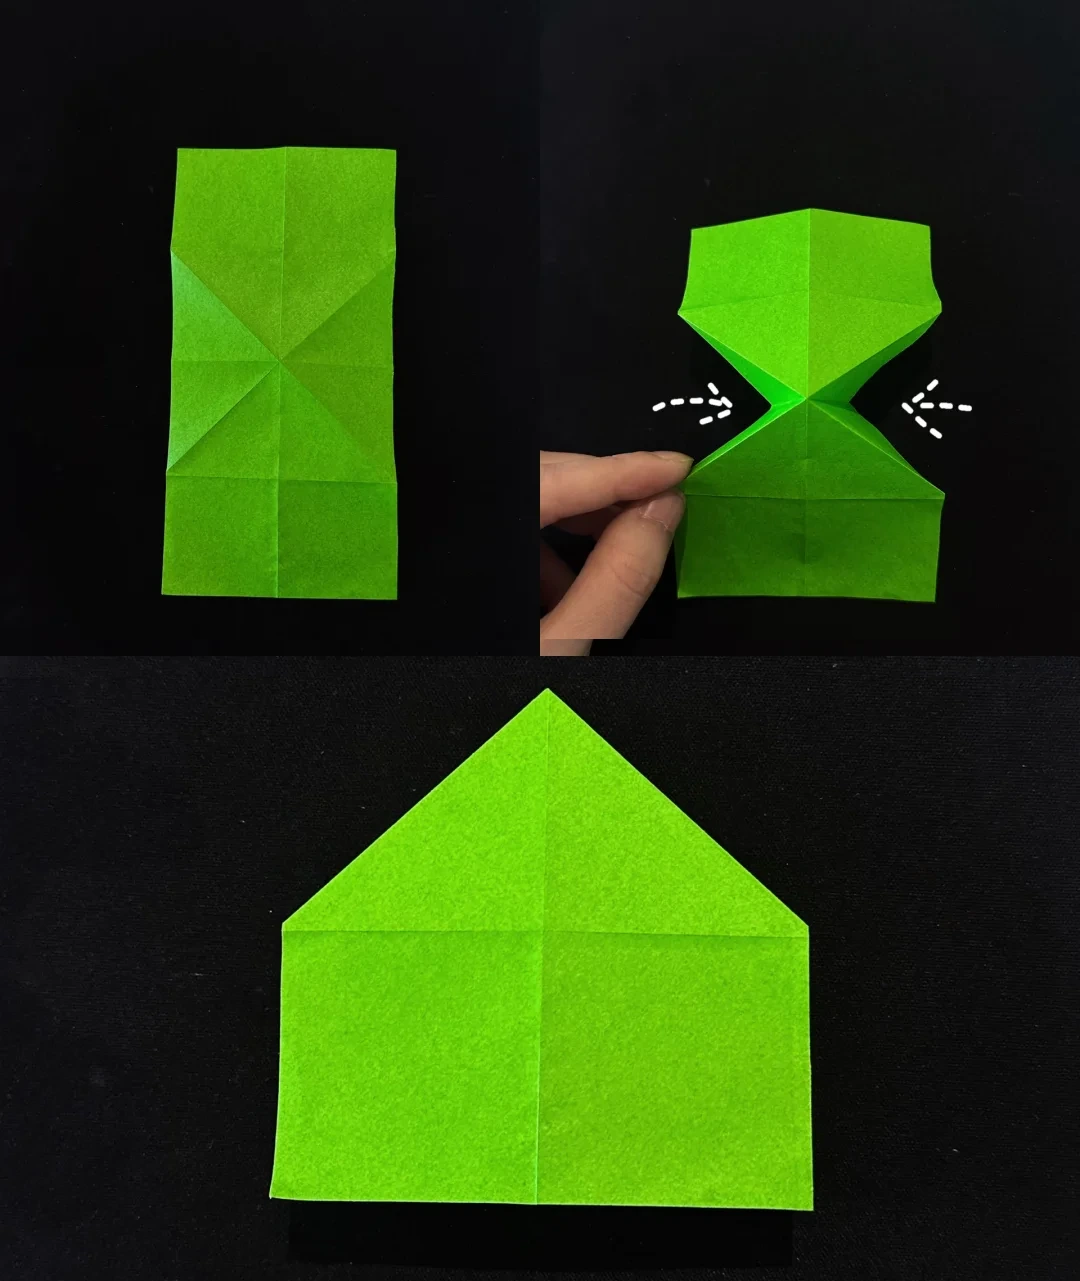 Open image at full size ↗
Turn the paper to the colored side. Push the two sides inward along the diagonal creases and flatten into the house-like shape.
Fold the lower layers
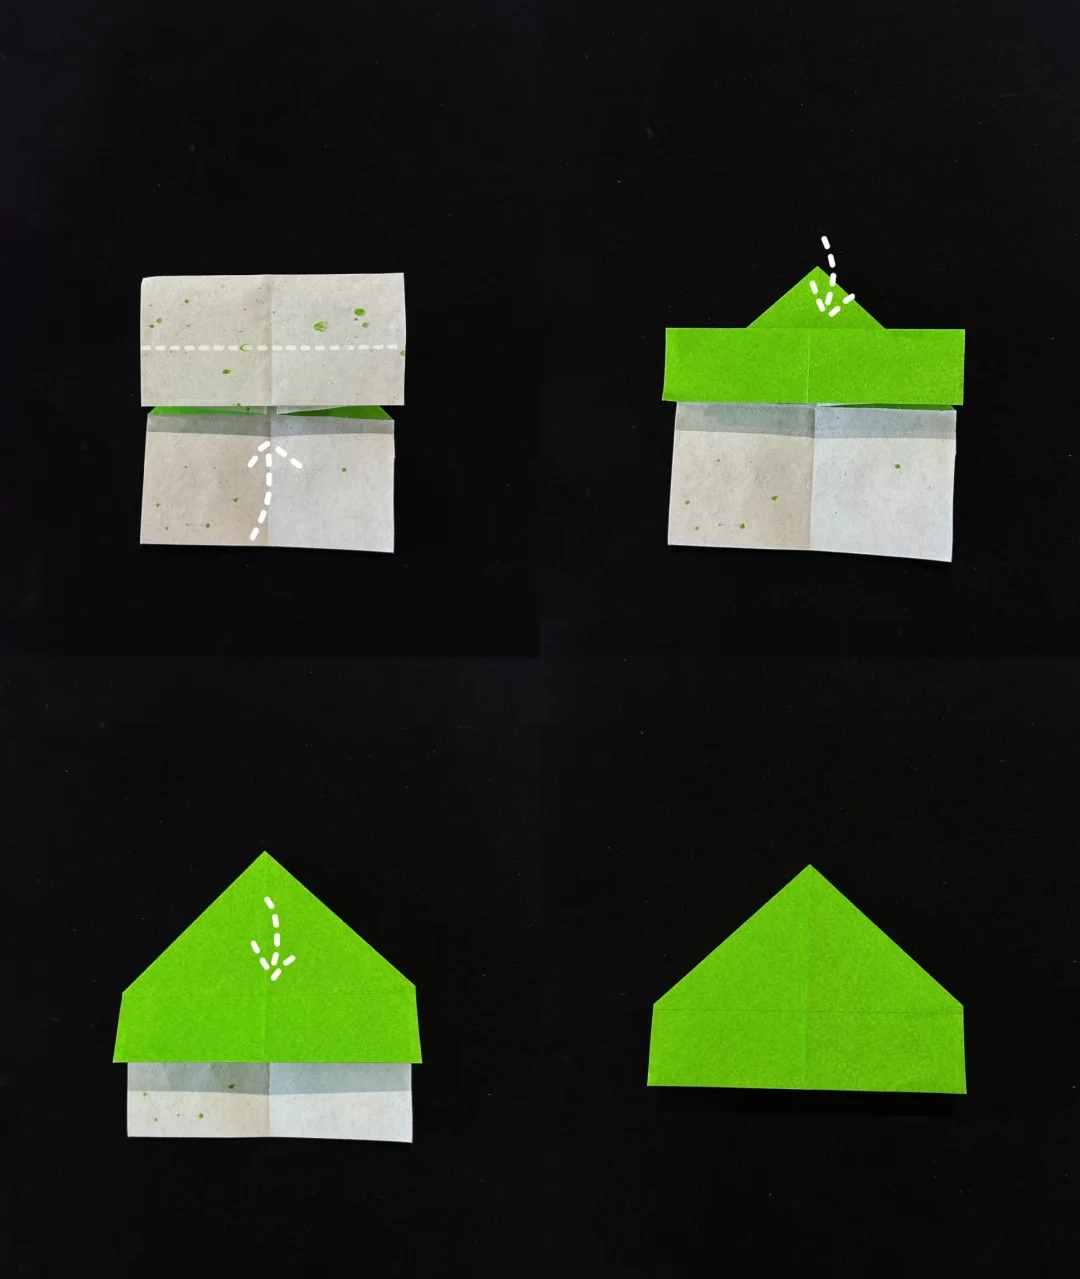 Open image at full size ↗
Fold the lower front flap upward. Fold its raised triangular tip down along the guide, then lower the flap again as pictured.
Repeat the same folds on the back.
Start the wing folds
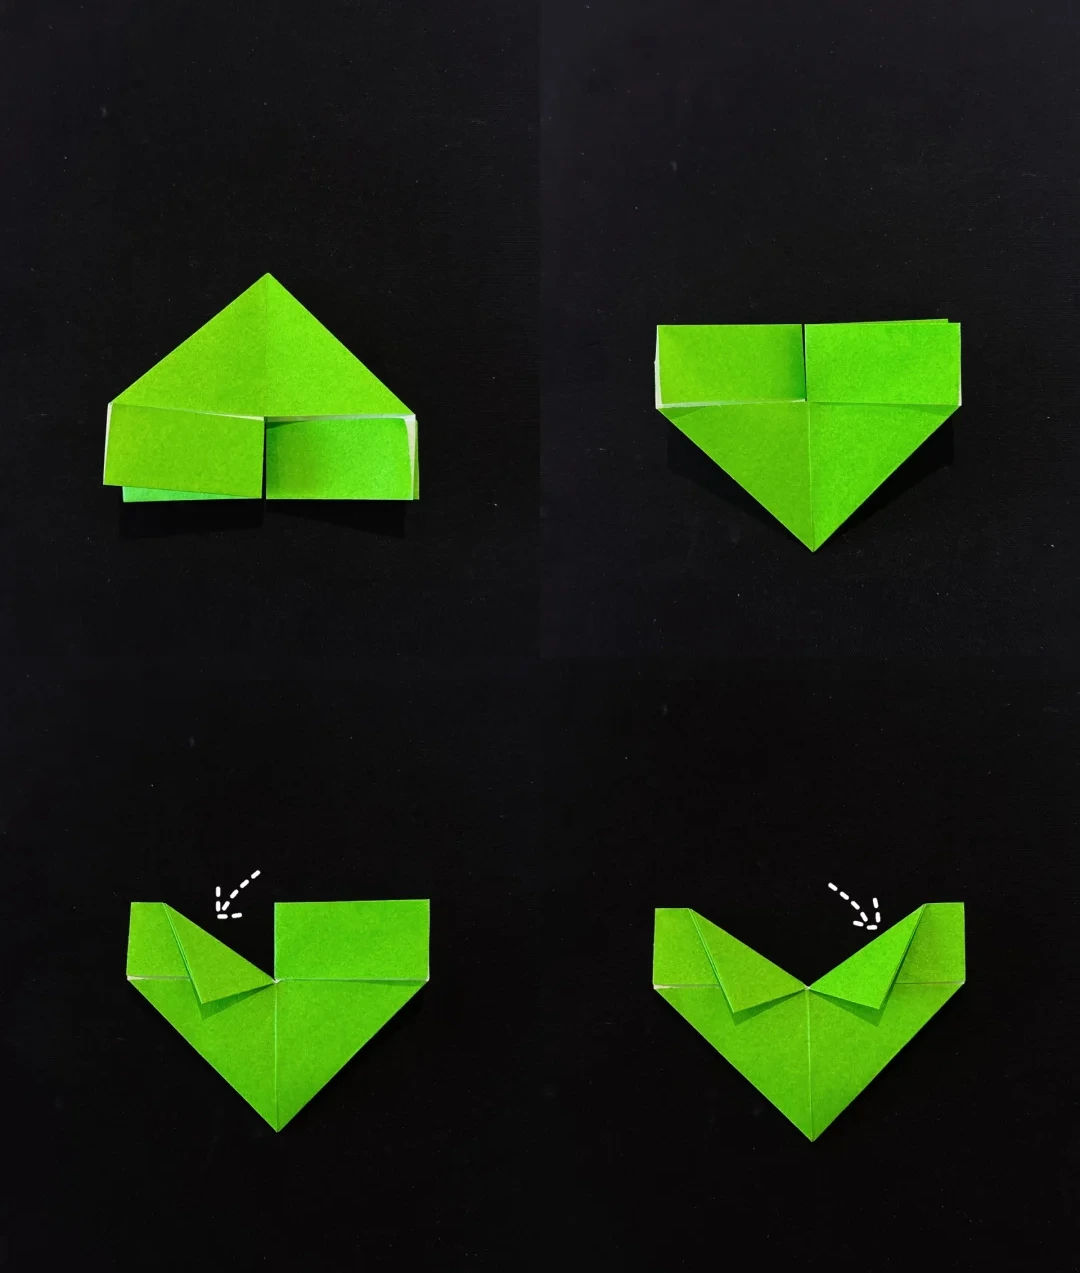 Open image at full size ↗
Turn the model over, then rotate it so the main point faces down.
Fold the left upper corner diagonally down toward the middle. Repeat on the right.
Open and flatten the wings
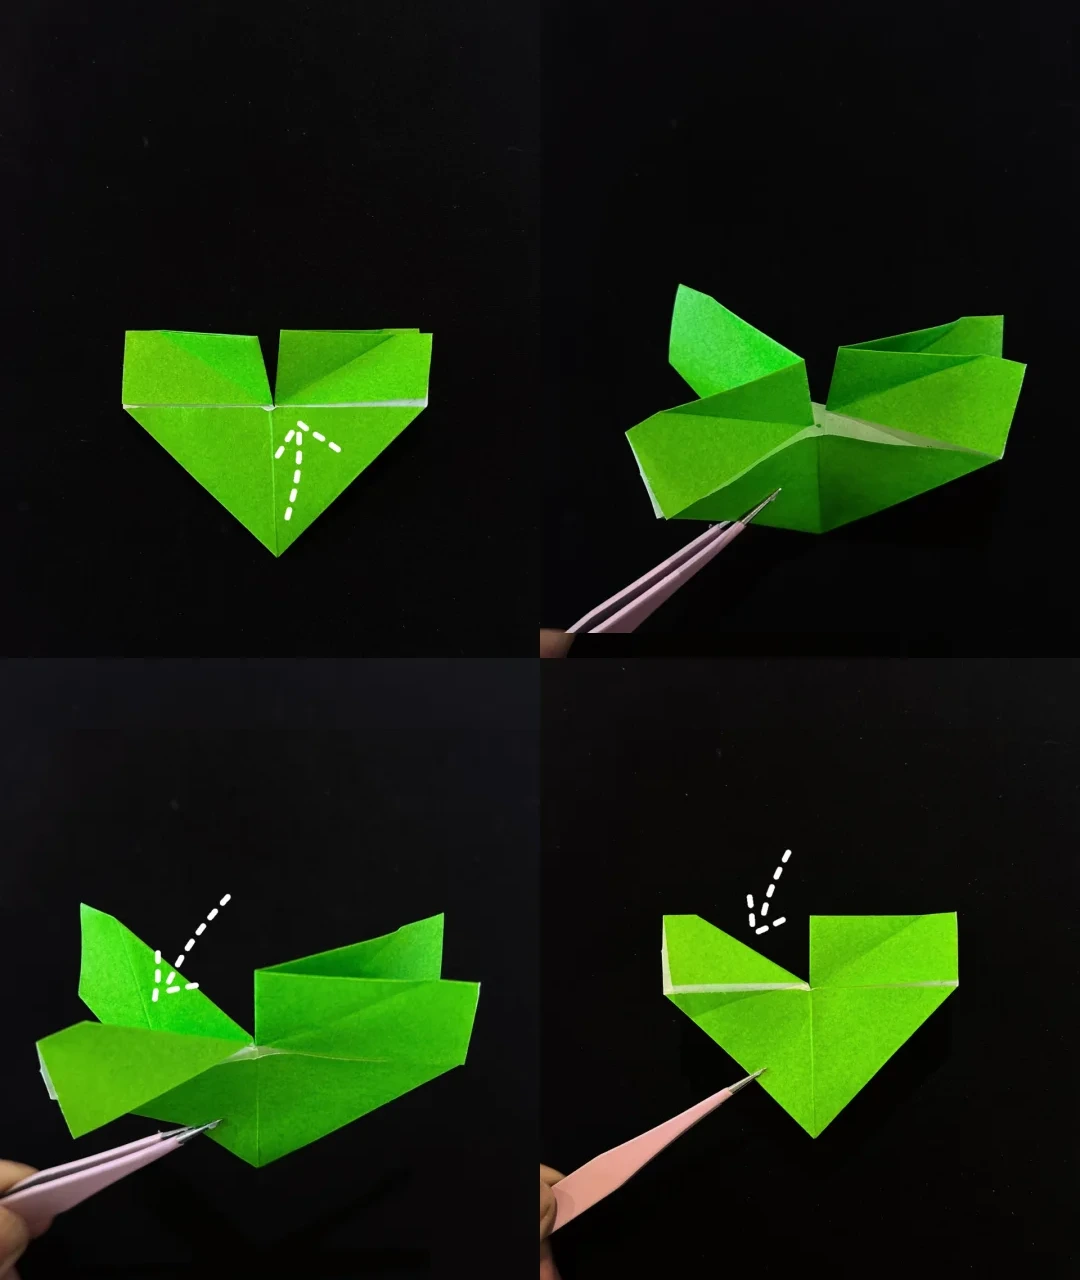 Open image at full size ↗
Lift the front triangular layer upward. Open the left section and fold it downward along its existing crease.
Spread and flatten the opened pocket into the shape shown at lower right.
Shape both sides
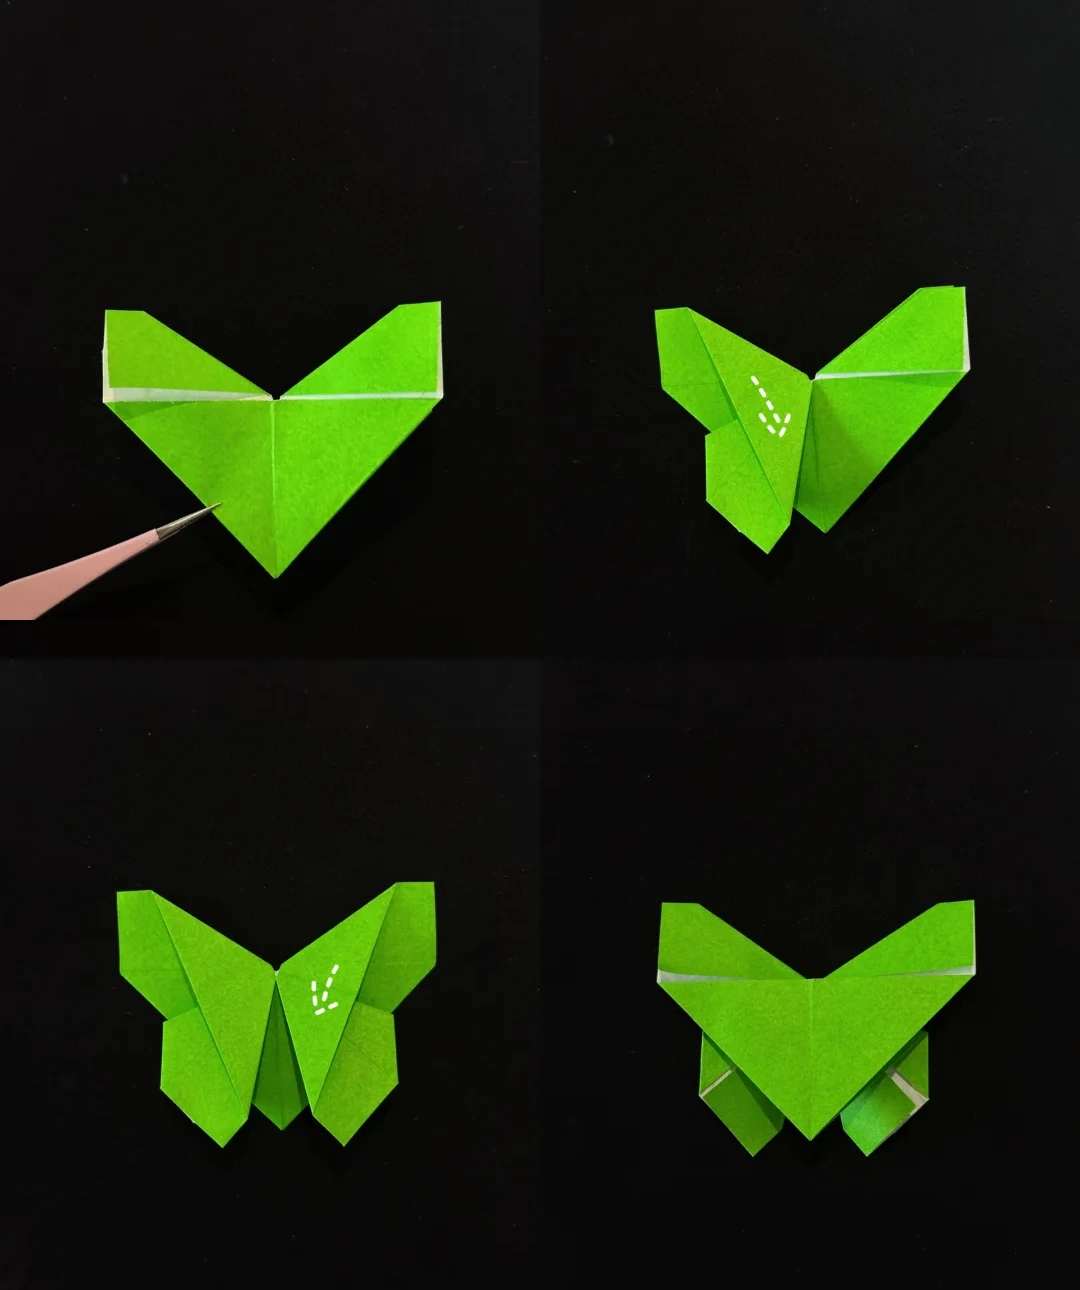 Open image at full size ↗
Repeat the opening fold on the other side. Lower the inner layers along their creases to define the wings.
Turn the butterfly over after both sides match.
Finish the body
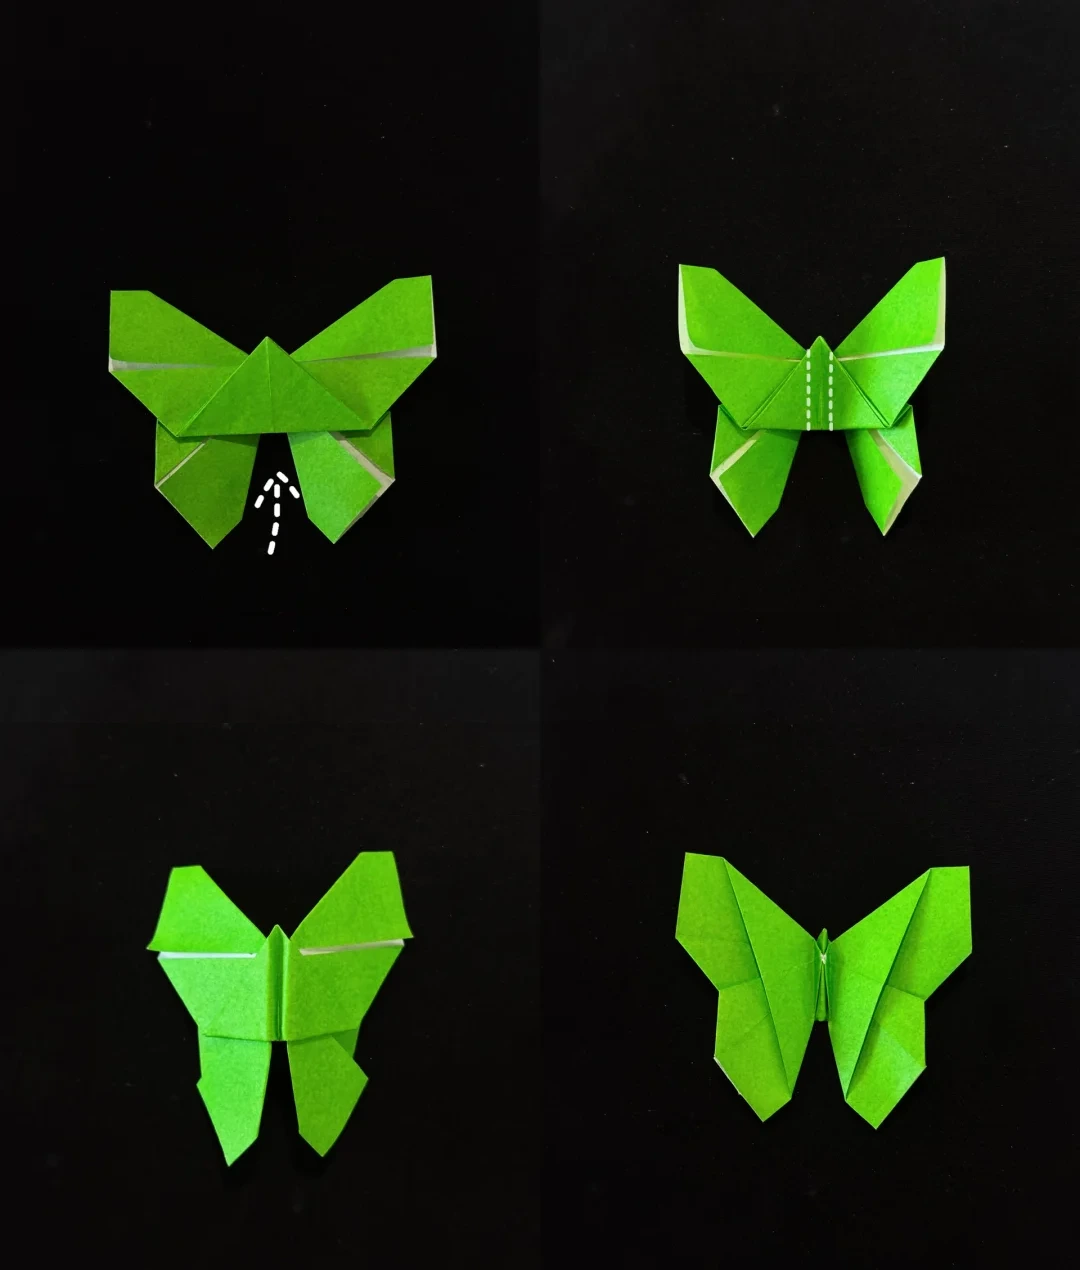 Open image at full size ↗
Fold the small lower section upward, then fold the indicated layers behind along the dotted guides.
Fold the butterfly along its central body crease, turn it to the front, and gently spread the wings.
Finished model
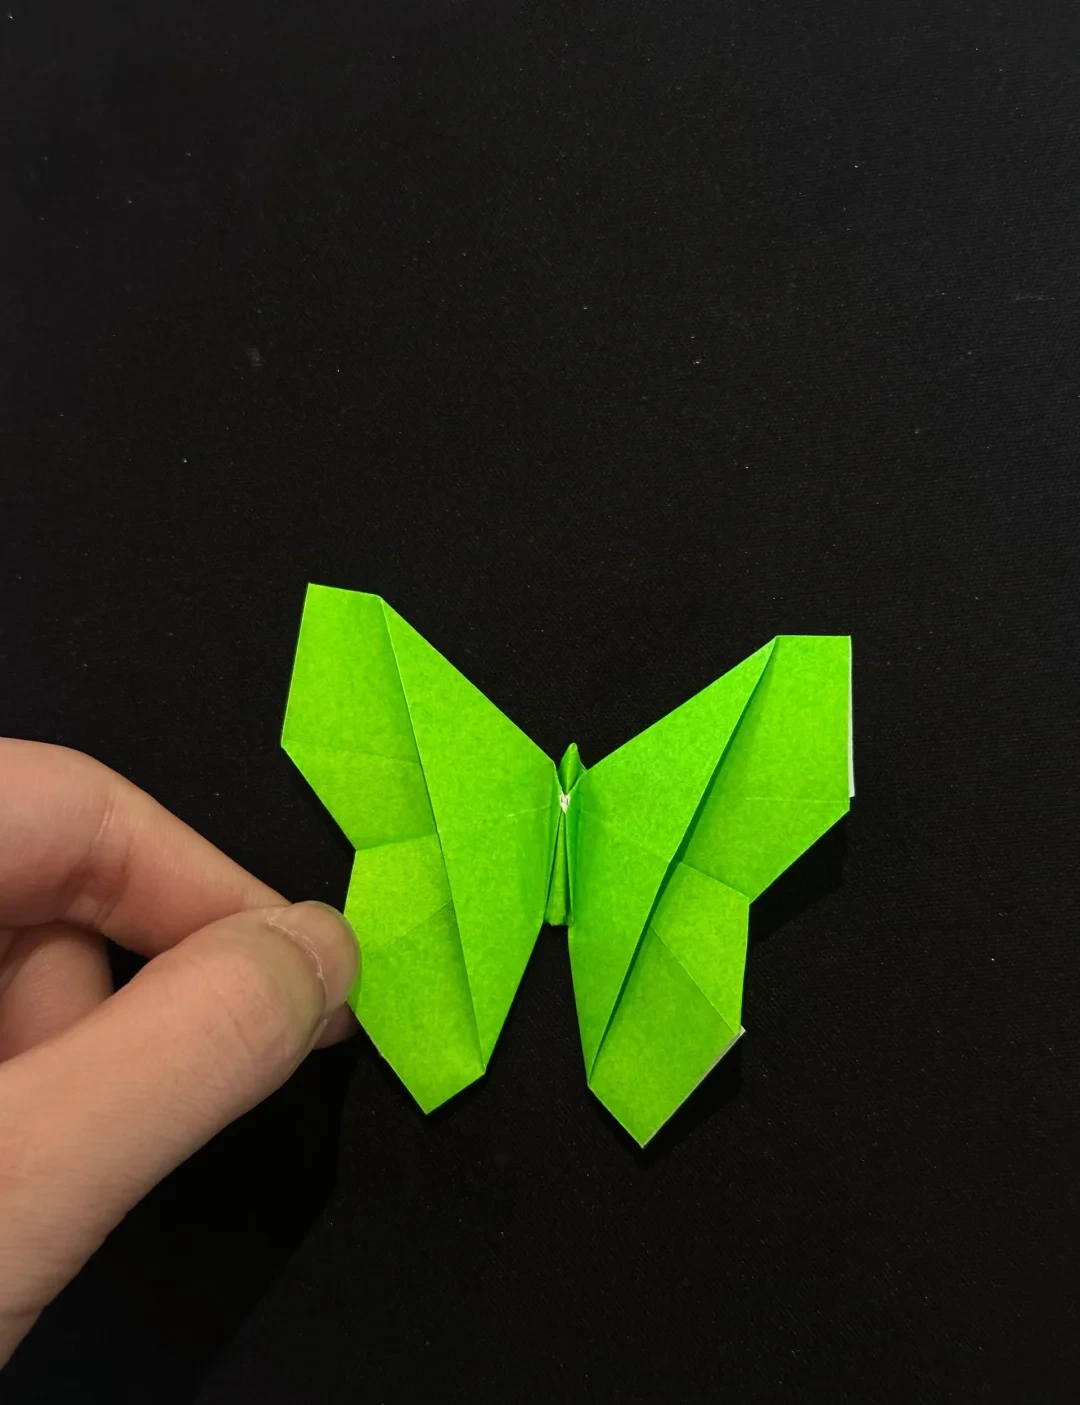 Open image at full size ↗
Use this finished example to compare the shape and proportions of your model.
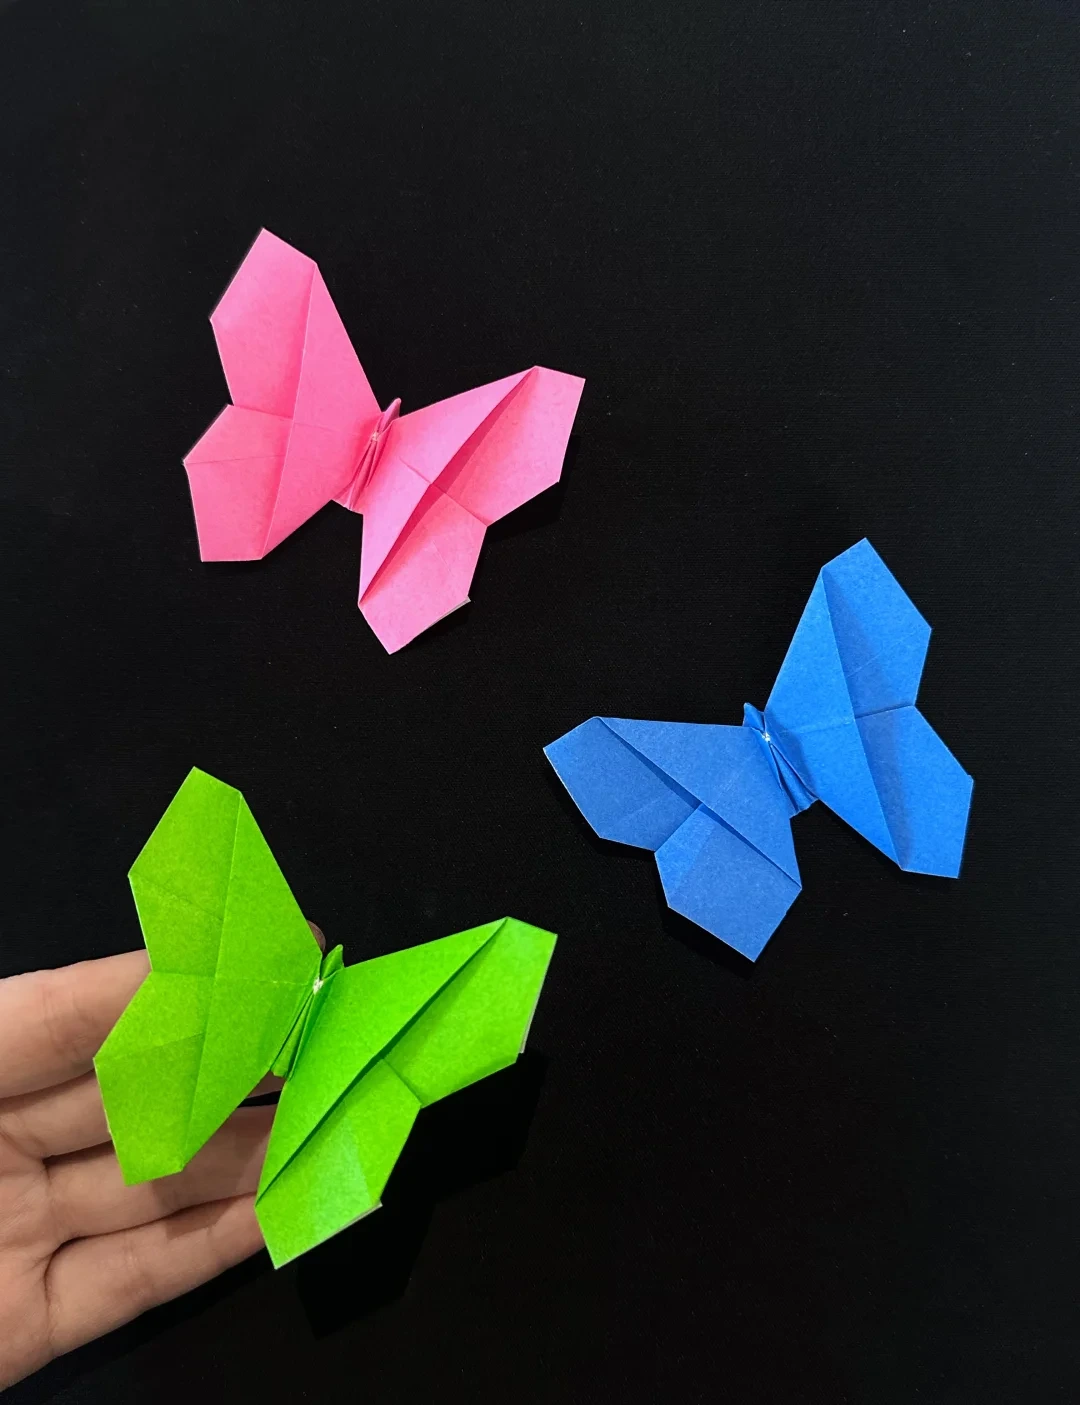
Finished model
 Open image at full size ↗
Use this finished example to compare the shape and proportions of your model.
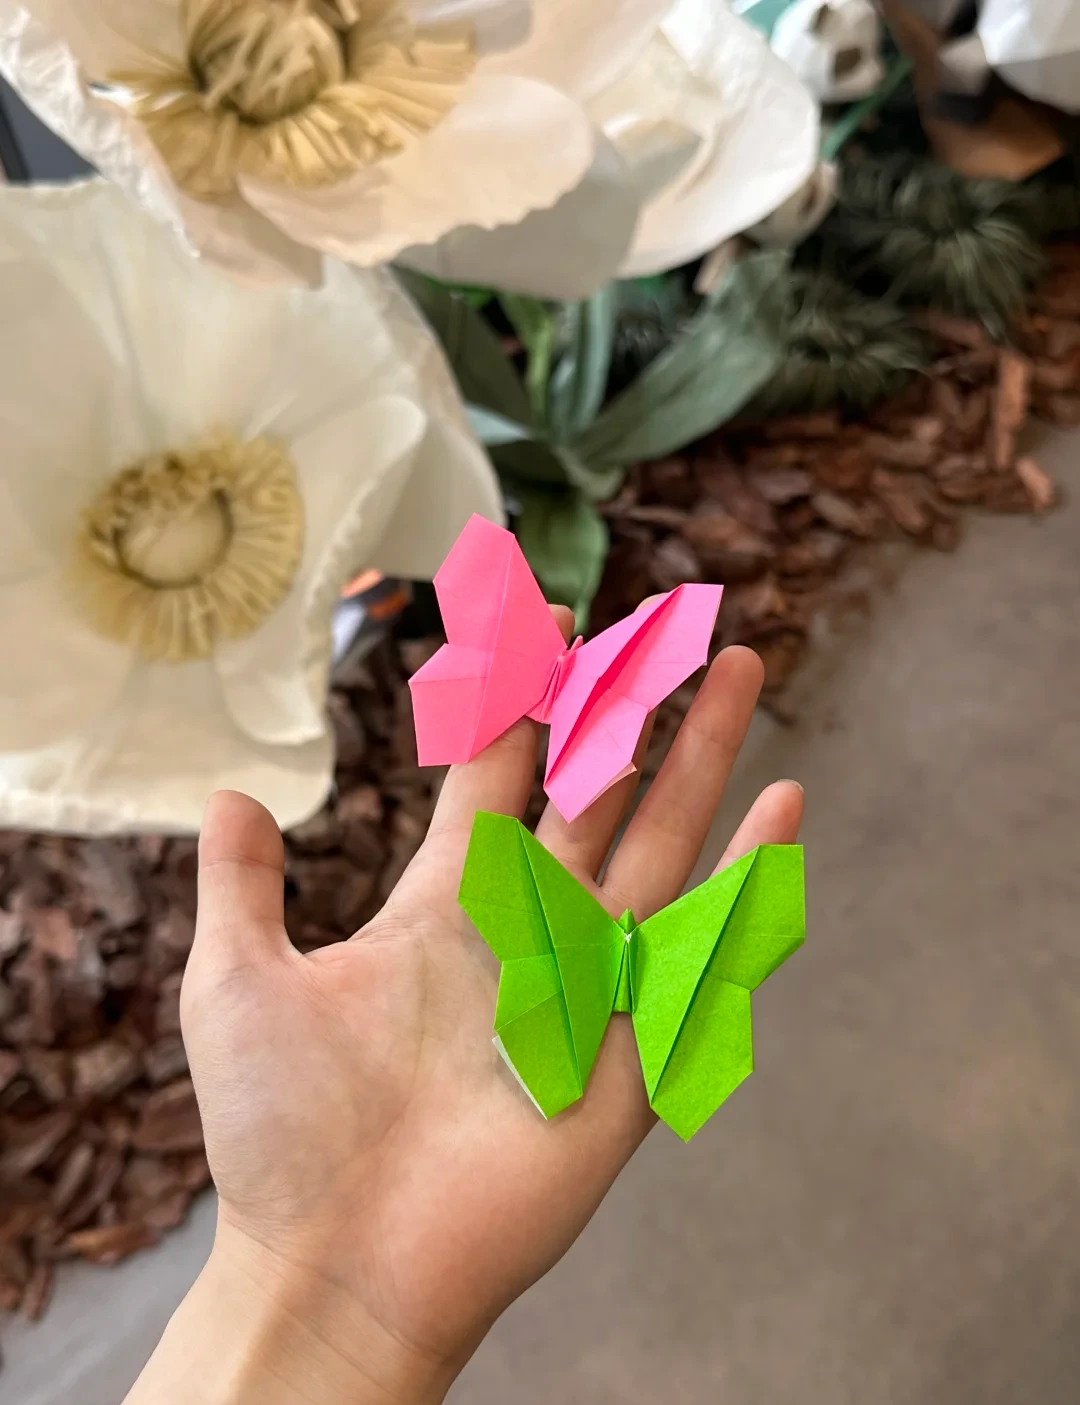
Finished model
 Open image at full size ↗
Use this finished example to compare the shape and proportions of your model.
Follow the diagrams alongside the step-by-step English instructions.
Choose your next project →